
 ChatGPT
 Perplexity
 Claude
 Gemini
You do not need to know special syntax, weights, or keyword stacking to get a good result with GPT Image 2.5. What the model rewards is a clear description of what you want to see, just written in a coherent order.
This guide walks through how to structure a prompt, how to describe the things that matter most in an image, and how to phrase an edit so the model changes that precise part and leaves the rest as it was.
One note before you start: in OpenArt, resolution, aspect ratio, and the number of images per prompt are set with the controls below the prompt box. Those settings override anything you type about those specifics, so you can leave them out of the prompt entirely and spend your words on the describing image itself.
Order your prompts and be specific
A reliable order is subject, composition, style, constraints. Working in that order keeps the important information first and makes the prompt easy to edit later.
Here is the same idea written loosely and then written in order:
Loose: "nice photo of a coffee cup, cozy vibes, professional"
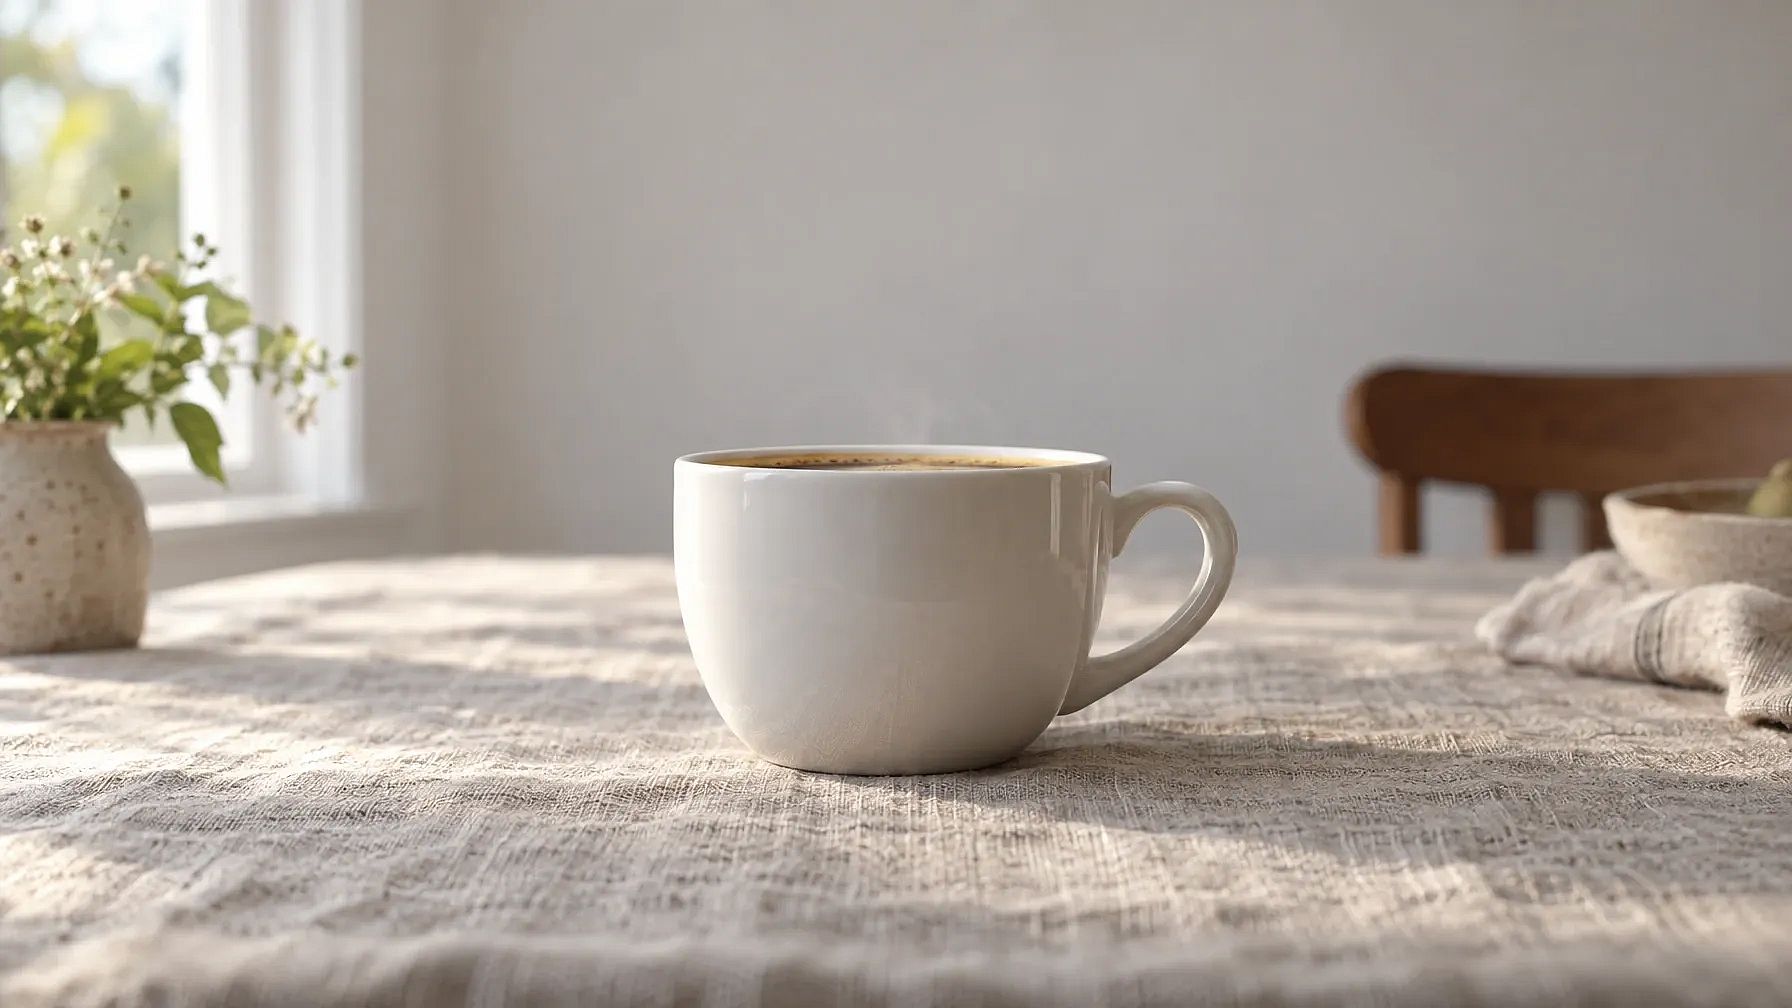
Ordered: "A white ceramic coffee cup on a linen tablecloth. Shot from a low angle, cup centered, the top third of the frame empty. Photorealistic, soft morning light from a window on the left, shallow depth of field. No text and no logos."
The second prompt gives the model a subject, a framing, a look, and a limit. Every one of those is something you can adjust on the next pass without rewriting the whole thing.
This is the image the ordered prompt produced in GPT Image 2.5 Flare:
Describe what purpose the image is for
Naming the purpose helps more than most people expect. "A product photo for a landing page hero" and "a flat-lay for an Instagram post" describe the same cup and produce different images.
Add the use case in a few words: a book cover, a thumbnail, a packaging mockup, a sticker, a slide background. The model uses that to make sensible choices about framing and negative space.
Replace mood words with concrete visual details
Words like cozy, epic, moody, and premium tell the model very little on their own. They work well once you attach something visible to them.
For wide or atmospheric scenes, describe scale, atmosphere, and color directly. "Epic mountain landscape" becomes "A granite peak filling the right half of the frame, low clouds across the valley below, cold blue light before sunrise." That version gives the model a picture to build rather than a feeling to guess at.
The same applies to people. Describe how much of the body is visible, how large the subject sits in the frame, where the eyes look, what the hands are doing, and so on.
Name the lighting, materials, and colors
These three carry most of the visual weight in a finished image.
Name the material by name: brushed aluminum, matte cardboard, wet asphalt, raw linen. Name the light by source and direction: a single window on the left, an overcast sky, a warm lamp behind the subject. Name the colors you want, and name the ones you want kept out.
If you want a photograph, ask for one. Words like photorealistic, real photograph, film grain, or shallow depth of field steer the look. Treat them as appearance cues, since they describe how the image should look rather than a camera that actually took it.
Put exact wording in quotation marks
GPT Image 2.5 renders text inside images more accurately than earlier versions, and quotation marks are how you tell the model which words are literal.
Write it this way: 'A poster with the headline "Open Late" in bold condensed type across the top, and "Thursday to Sunday" in small type at the bottom. No other text.'
Three habits make text come out right more often. Spell unusual words and brand names letter by letter. Describe where each line sits and roughly what the type should look like. Ask for no extra text, since stray words are the most common problem in text-heavy images. Then read the output before you publish it, and fix any spelling with a follow-up edit.
Give every reference image a clear job
When you upload more than one reference, tell the model what each one is for. Without that, it blends them.
Assign roles plainly: "Use the first image for the product. Use the second image for the background setting. Use the third image for the color palette only." Then explain how they should combine, and which element moves where. "Place the product from image one on the table in image two, matching the light direction in image two."
Change one thing at a time when you edit
Editing works best as a sequence of single decisions. Ask for one change per turn, look at the result, then ask for the next.
Start the instruction with the change itself: "Change only the background to a plain grey studio wall." Short, specific, and scoped to one thing. Five clear turns will get you further than one prompt carrying five requests.
List what should stay unchanged in the edit
This is the habit that separates a clean edit from a redo. Alongside the change, name what you want preserved.
A full edit prompt looks like this: "Change only the background to a plain grey studio wall. Keep the product's shape, label text, colors, and reflections exactly as they are. Keep the lighting direction and the shadow under the product."
Restate those constraints on every turn. Across a long editing session, details can drift, and repeating the list is what keeps the version you approved intact. Phrases like "same style as before" give the model useful context, so use them alongside your specifics rather than in place of them.
Describe what you do not want in the image
A short exclusion list is one of the cheapest quality wins available. Common ones worth keeping on hand:
- No extra text
- No watermarks or signatures
- No logos
- No heavy retouching
- No gradients unless essential
Exclusions matter most for transparent backgrounds and product cutouts, where a stray shadow or a faint backdrop defeats the point. Ask for a clean edge and nothing behind the subject.
Use labeled sections for long, complex prompts
When a prompt grows past a few sentences, break it into labeled lines. The model reads them fine, and you get a prompt you can actually maintain. Let's look at an example:
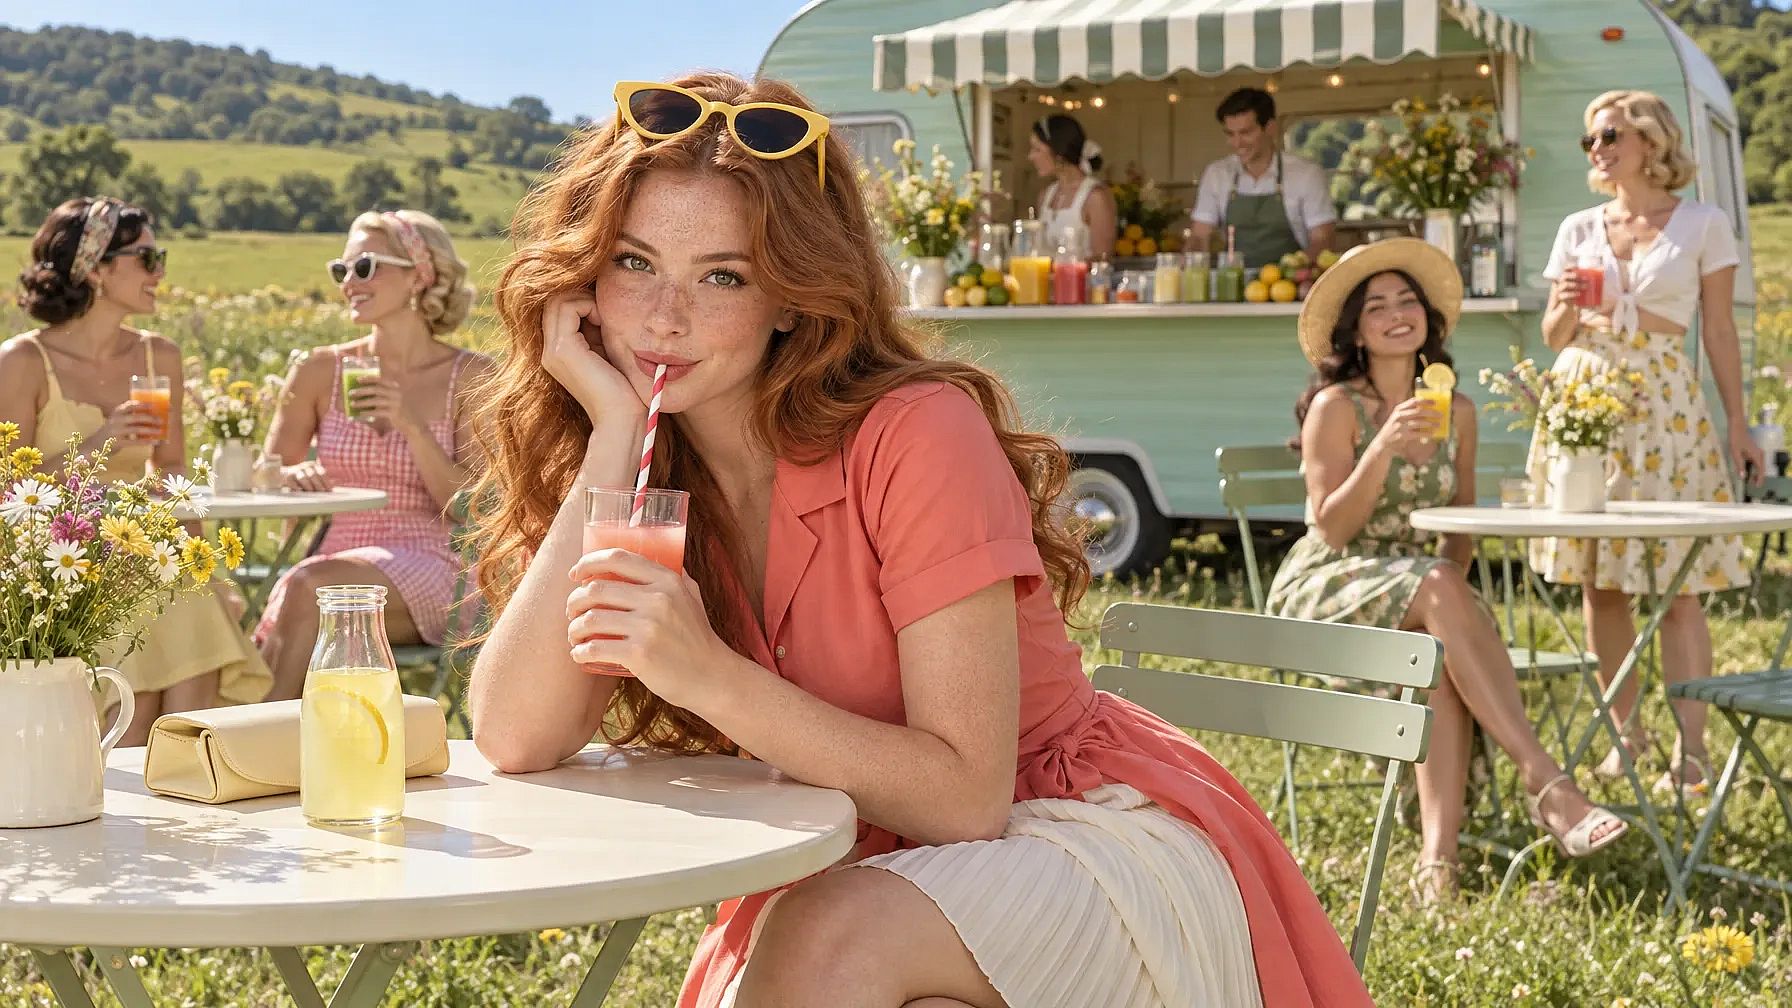
SCENE: Sunlit grassy hillside meadow, rolling green hills, blue sky. A vintage mint-green caravan converted into a juice bar sits mid-ground under a cream-and-sage striped awning, its window lined with bottles of colorful fresh juice, citrus, and wildflowers. Two attendants serve at the counter. Cream bistro tables and sage folding chairs on the lawn.
SUBJECT: Foreground: young woman, long wavy copper hair, freckles, yellow cat-eye sunglasses on her head, coral shirtdress over cream pleated skirt. She leans on the table sipping pink fruit juice through a red-striped straw, looking straight at camera. Beside her, a lemonade bottle with a lemon slice, pale yellow clutch. Background: four women in pastel summer clothes seated and standing, each holding a glass or cup of juice.
ART STYLE: High-end fashion editorial photography, retro 1950s Americana with modern polish. 50mm lens, sharp foreground, softly blurred background. Bright midday sun, pastel palette of coral, butter yellow, mint, blush, cream. Wide cinematic framing.
CONSTRAINTS: No ice cream, milkshakes, whipped cream, cones, or dessert glassware. No ice cream van or signage. No text or logos. No buildings, cars, or phones. Natural hands and anatomy.
The result produced by GPT Image 2.5 Sunburst:
Next time you need a variation, you just change one line.
Choose your mode, then test with the same prompt
Flare and Sunburst respond to the same prompting habits, so nothing above changes when you switch.
Use Flare while you are exploring, writing variations, and producing everyday assets. Move to Sunburst when the image needs to hold up under close inspection, or when an edit needs tight control over what stays the same.
When you are deciding between them, run the same prompt, the same references, and the same settings through both, and compare the two results before you start adjusting anything else.
Common mistakes to avoid
- Leaning on special syntax, symbols, or weights. Clear sentences work better and are easier to edit.
- Adding unrelated instructions to a focused request, which pulls the model in two directions.
- Dropping your preservation list partway through an editing session.
- Using vague descriptors with no concrete visual detail attached.
- Expecting a higher quality setting to fix a vague prompt. The description is what carries the result.
Putting it together
Describe the subject, frame it, name the look, and set your limits. When you edit, ask for one change and list what should stay. Keep the settings in the controls next to the prompt box, and keep your words on the image.
Start with a prompt you can read back to yourself and imagine in your head. If you can visualize it, the model has a good chance of making it right.
Prompt your wildest ideas into reality with GPT Image 2.5 on OpenArt's AI image generator.