[v2.1] AnimateDiff ControlNet Animation Raw _v2 - LCM [Part 2]
5.0
1 reviews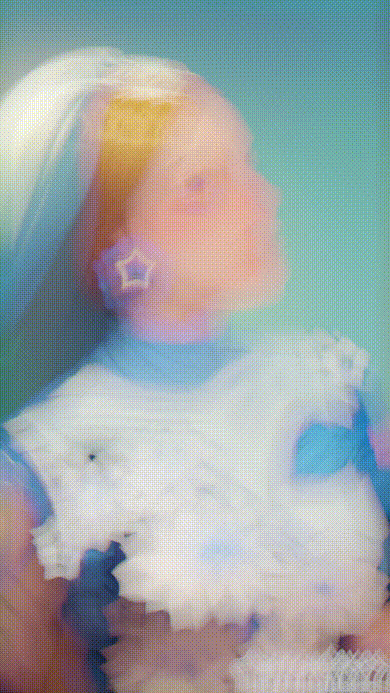
Description
1) Video Tutorial : https://youtu.be/qczh3caLZ8o
2) Documented Tutorial : https://www.patreon.com/posts/update-v2-1-lcm-95056616
.
.
3) Render Video with Sound : https://youtube.com/shorts/GhVfdrsKCKw
.
.
What this workflow does
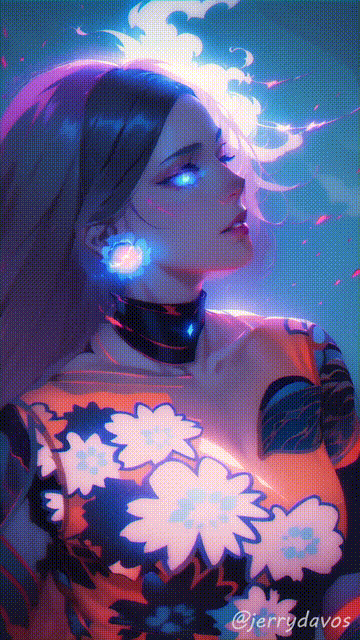
This workflow can convert any (cartoon/realistic/anime) video into another (Cartoon/Realistic/Anime) video.
Make stylize videos, Render 3D concepts, Convert Anime to Realistic, Make Abstract Animations, It's application are limitless, as control passes can be generated through any 3D or 2D software as well.
*This workflow use "batch2batch" processing so any video length duration can be made or converted.
How to use this workflow
This workflow utilized "only the ControlNet images" from external source which are already pre-rendered before hand in Part 1 of this workflow which saves GPU's memory and skips the Loading time for controlnet (2-5 second delay for every frame) which saves a lot of time for doing final animation.
The Passes can be created for anything, humans, animals, cars, nature, abstract things and even from 3D CG renders, This new technology opens up doorways to a whole new technique of Rendering.As a 3D artist, this technique can minimize the efforts needed to achieve a good quality output and in only a few amount of time.
Steps:
- 1) Choose Model checkpoint you want to use
- 2) Enter Width and Height of your Output Image
- 3) Choose Positive Prompts you want to see in the output
- 4) Choose Loras, (You have to experiment which looks good or not)
- 5) Paste the Passes Directories in ControlNets (1 and 2) Loaders and set their models and weight (See Neon Purple note)
- 6) Paste The Directory where you want to save the Images in the Output Save Directory Node
- 7) Select Batch Range (Number of images you want to render in one Queue)
- 8) Choose LCM Settings, Default is good but experimental (See note)
- 9) After every batch you can increase the batch naming for organizing the batches.
- 10) After every queue increase the skip frames to the Total number of images rendered already.
- 11) After All the batches are rendered it's Ready for [Part 3] Refiner workflow
If you need Cloud GPU : https://www.runcomfy.com/?ref=jerrydavos
My Discord Server : https://discord.gg/z9rgJyfPWJ
Discussion
(No comments yet)
Loading...
Reviews
No reviews yet
Versions (1)
- latest (2 years ago)
Node Details
Primitive Nodes (46)
Note (16)
PrimitiveNode (5)
Reroute (25)
Custom Nodes (54)
- ADE_AnimateDiffUniformContextOptions (1)
- ADE_AnimateDiffLoaderWithContext (1)
- ADE_AnimateDiffModelSettingsSimple (1)
- CheckpointLoaderSimpleWithNoiseSelect (1)
- CR Integer To String (1)
- CR LoRA Stack (2)
- CR Apply LoRA Stack (1)
ComfyUI
- EmptyLatentImage (1)
- VAEDecode (1)
- KSamplerAdvanced (2)
- PreviewImage (3)
- CLIPSetLastLayer (1)
- ControlNetApplyAdvanced (2)
- LoraLoader (1)
- VAELoader (1)
- ModelSamplingDiscrete (1)
- LatentUpscaleBy (1)
- BNK_InjectNoise (1)
- TonemapNoiseWithRescaleCFG (1)
- LoadImagesFromDirectory (2)
- ControlNetLoaderAdvanced (2)
- VHS_SplitImages (3)
- FloatConstant (7)
- Cfg Literal (3)
- Int Literal (5)
- smZ CLIPTextEncode (2)
- Image Save (1)
- Text Multiline (2)
- Text String (1)
- Text Concatenate (1)
- String to Text (1)
Model Details
Checkpoints (1)
imp_v10.safetensors
LoRAs (1)
lcm_pytorch_lora_weights.safetensors