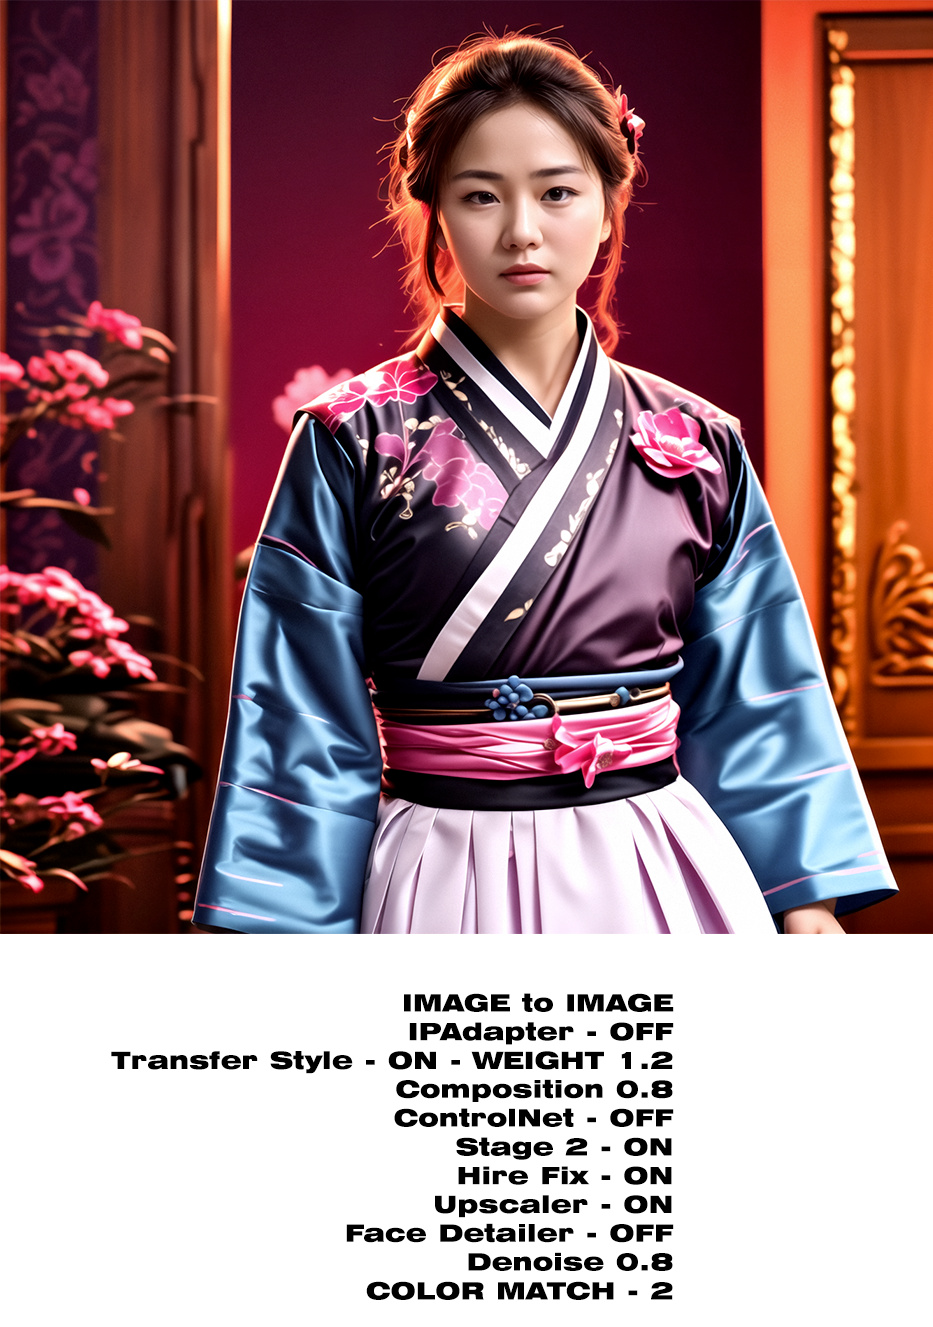
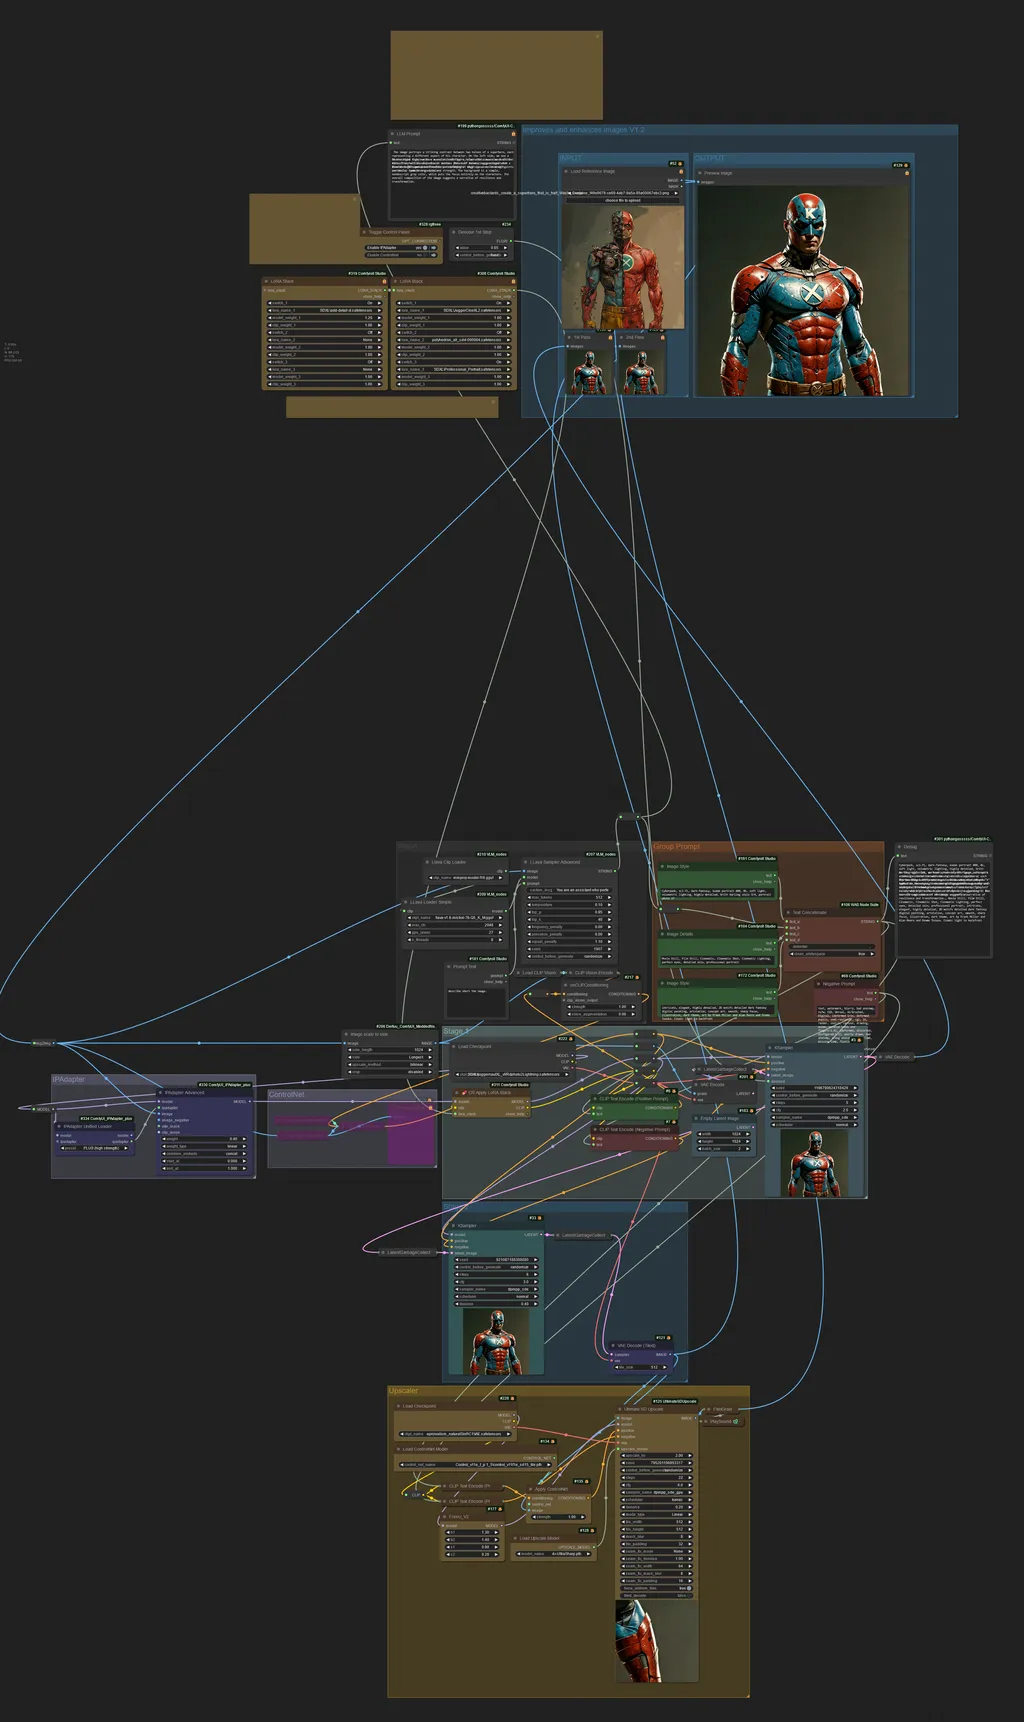
Improves and enhances images V2.0.3 (OBSOLETE)
5.0
2 reviewsDescription
Current Version 2.0.3
PLEASE take a look at the MODEL SECTION, there is important information to know
PLEASE take a look at the TIPS SECTION, for your convenience.
Workflow for Enhancing Images
This workflow was created to enhance and improve images that you’ve previously processed with other workflows. Perhaps you have older images, taken months ago, or maybe these images were captured using outdated models.
I designed this workflow to breathe new life into images I had created many months ago using the base Model 1.5. Some of these images were intriguing, so I thought I could revive them. I experimented with images that lacked details, appeared unrealistic, or lacked proper composition.
Once I developed my workflow, I thoroughly tested it and integrated various nodes to achieve a convincing final result.
How It Works
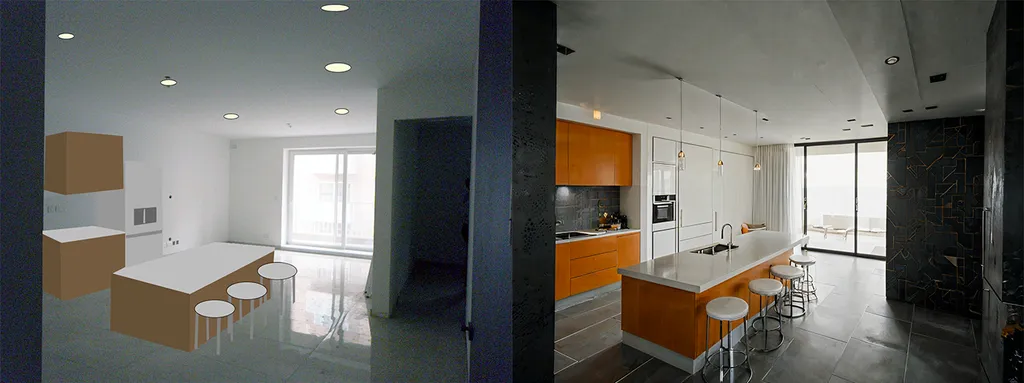
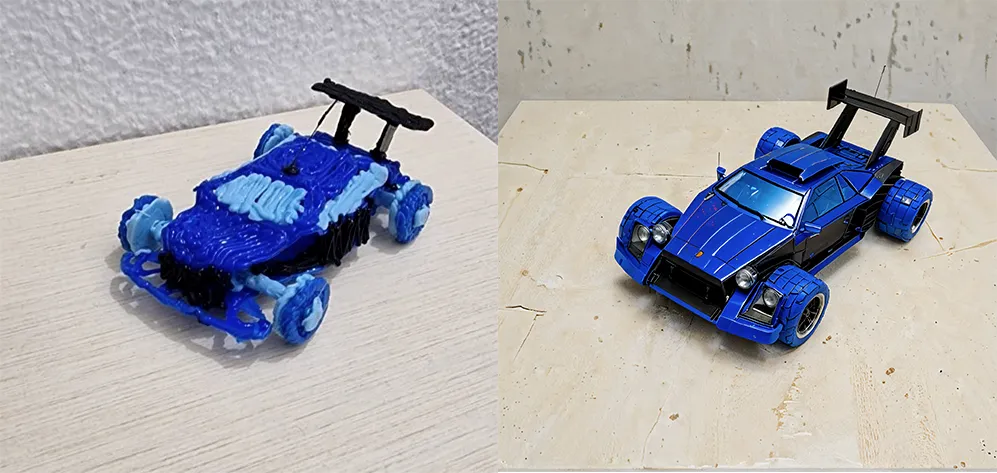
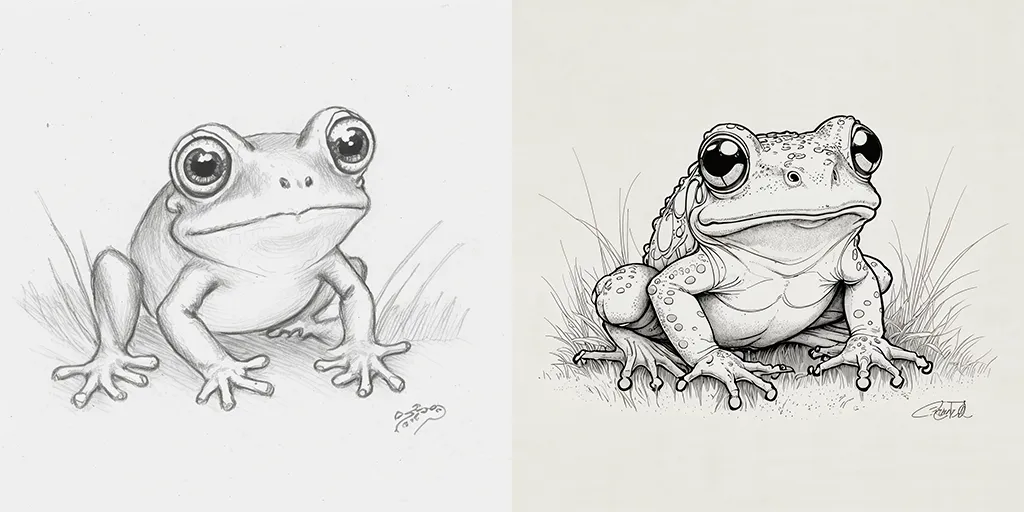
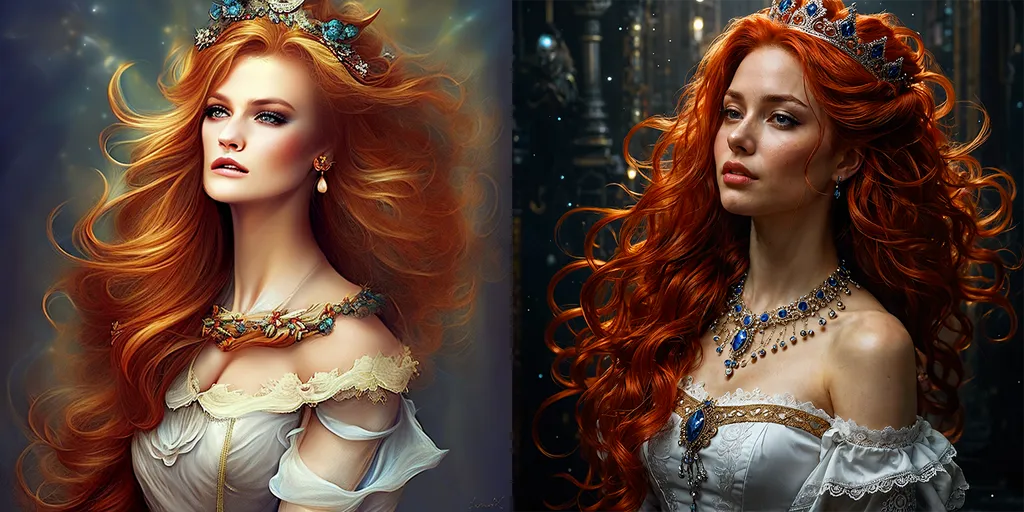
This workflow utilizes the “Image to Image” method to extract data from the input images, enhancing and empowering them. These improvements can be applied to various types of images, including pencil sketches, basic shapes and colors, detailed or non detailed images—virtually any image type.
I ensured that when an image is input, it is resized so that the longer side is 1024 pixels. I incorporated this optimization as a matter of better image processing, on the one hand it enlarges smaller images to make better use of them, and on the other hand it speeds up processing, in case you enter images with sizes larger than 1024. The final image will be twice the size, that is, the longest side will be 2048 pixels.
Additionally, I incorporated a section that uses LLM (Large Language Model) to provide a more accurate description of the image.
Functionality
The images undergo processing in three steps:
- First Step (XL Model): The image is passed through both LLM for description and the first Ksampler. The Ksampler applies denoising with a default setting of 0.65, improving the input image without completely distorting it. You can adjust the denoising level in the upper part of the workflow, where the image input and full processing output are located.
- Second Step: The image proceeds to another Ksampler with a fixed denoising value of 0.4.
Final Step: Ultimate SD Upscale Node
In the final step, the image is passed to the Ultimate SD Upscale node, where I opted for a Model 1.5. The top part of the workflow features a straightforward and minimalist graphical interface. Within this section, you’ll find everything necessary to enhance your images, including:
- Denoise Node: This node set the Denoise for the first Ksampler (First Step).
- Image Upload Node: Use this to load your images.
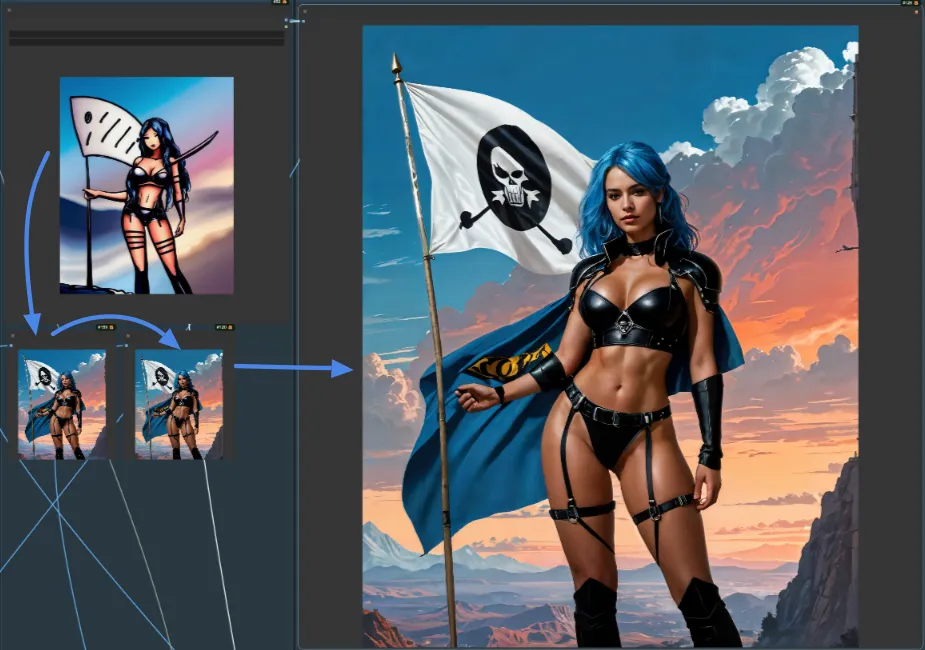
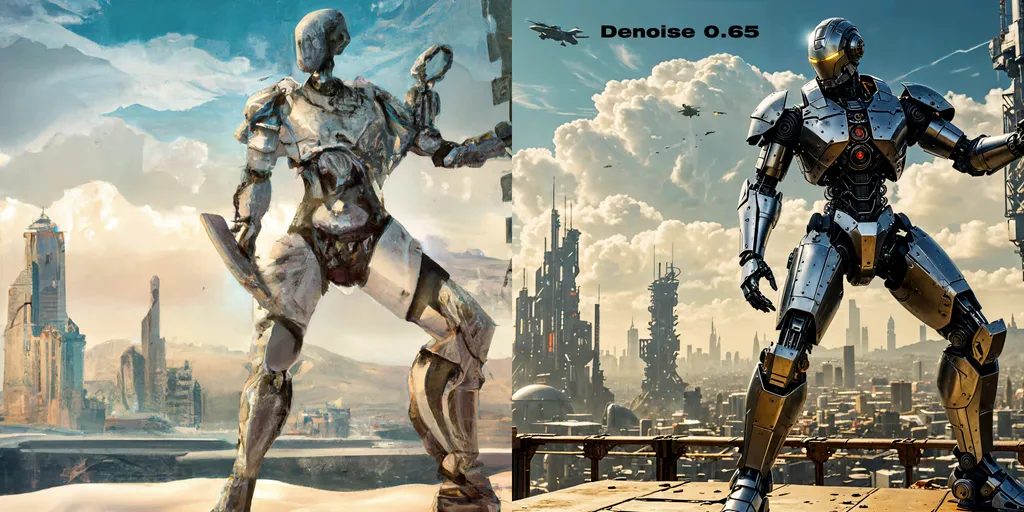
 The reference image in this workflow was taken randomly from MidJourney. Experiment with IPAdapter on, ControlNet Off, Denoise at 0.65
The workflow, with these settings, went from a 2D conceptual image to a 2.5D finished image. Not bad.
As a reminder, the workflow’s operation is straightforward: upload an image and click “Queue Prompt.”
The workflow takes care of the rest.
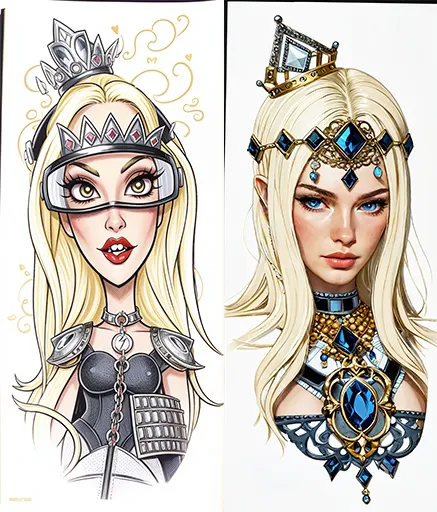
Below, I’ve included a couple of comparisons between the input and output images. You can find and download all the original reference images in the workflow assets, located on the right side of this page.

 _______________________________________________________________________________________
Denoise Comparison Images

 _______________________________________________________________________________________
ChangeLog
Version 1.1
Added two LoRA Stack nodes, so you can use up to a maximum of 6 LoRAs.
Note that the more LoRAs you use, the longer it will take to complete the WorkFlow.
tip: the default Denoise is 0.65 but adding several LoRAs should lower it a bit I did some testing, and with 4 LoRAs I noticed that Denoise at 0.6 works the same as Denoise at 0.65 in V1
Added a node (FilmGrain) to inject a slight Film Grain to the final image,
placed at the output of the Ultimate SD Upscale node
Version 1.2
- New IPAdapter feature: Added a group with the IPAdapter feature. This feature allows you to retain much of the detail and composition of the reference image even with high levels of Denoise.
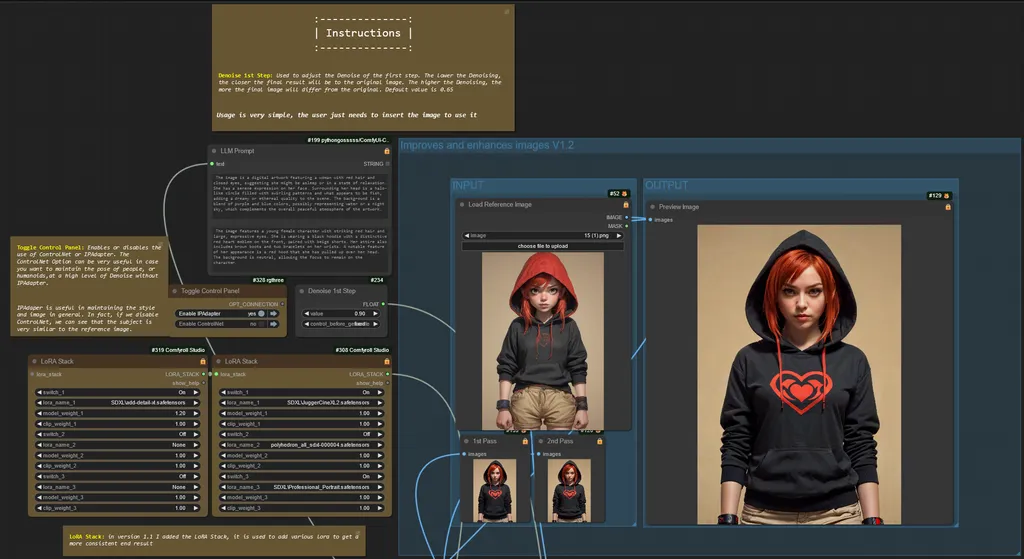 Image 01 - only the IPAdapter feature was used with a denoise of 0.90. you can see that the final image retained detail and composition.
- New ControlNet feature: Added a group with the ControlNet feature. This feature allows the pose of a human or humanoid character to be maintained even with high levels of Denoise.
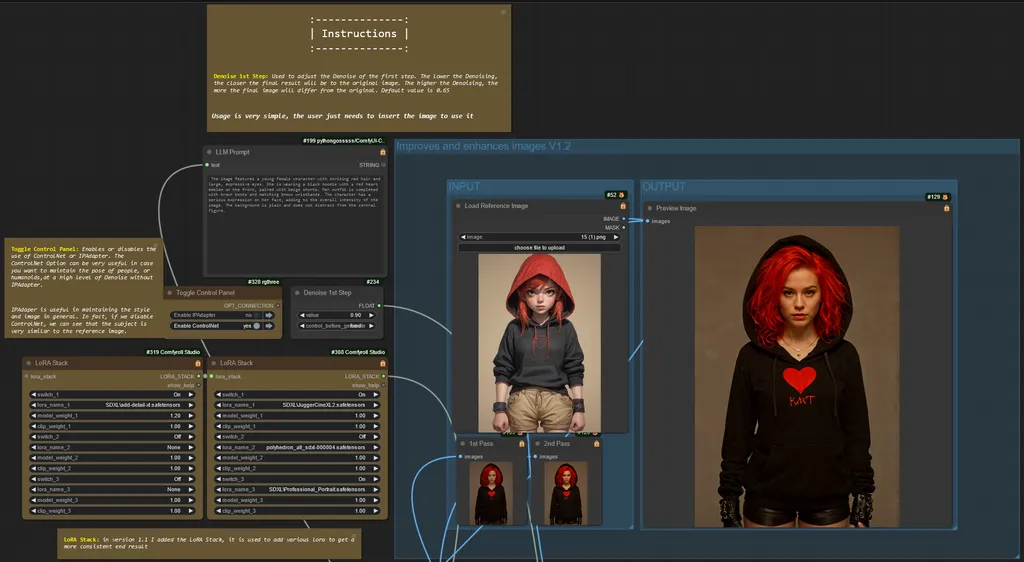 Image 02 - only the ControlNet feature was used with a denoise of 0.90. You can see that the final image has kept the pose but has different details, notice hair that is wavy and voluminous compared to the reference image, the sleeves of the sweatshirt that are lowered compared to the reference image, the gloves instead of being bracelets, different color shorts, brightness does not match the reference.
- Simultaneous Feature Activation: It is possible to activate both features at the same time. This allows us to obtain a final image that maintains the position, details and composition compared to the reference image, but with variations in style and some details compared to it.
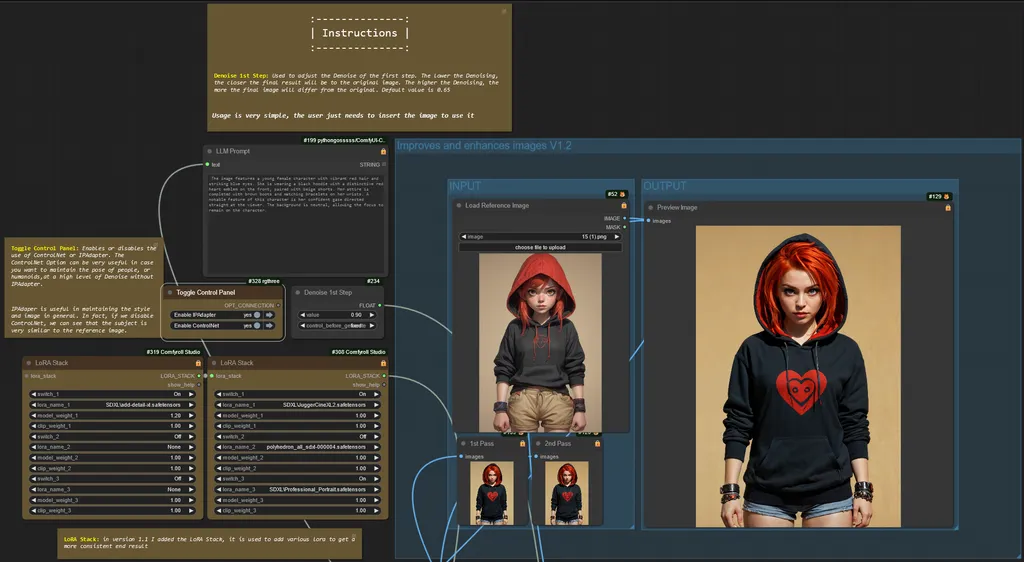 Image 03 - both active features, IPAdapter and ControlNet, Denoise by 0.90. You can see how the pose, details, composition, even light match the reference image. Of course, having a Denoise of 0.90, we can see small differences, such as the hood, which although it is two-tone, the colors are reversed in position, the sweatshirt is kept off the shorts, and the shorts themselves are of a different fabric than the reference image.
____...____
The next image has both features disabled, always maintaining a high level of Denoise (0.90).
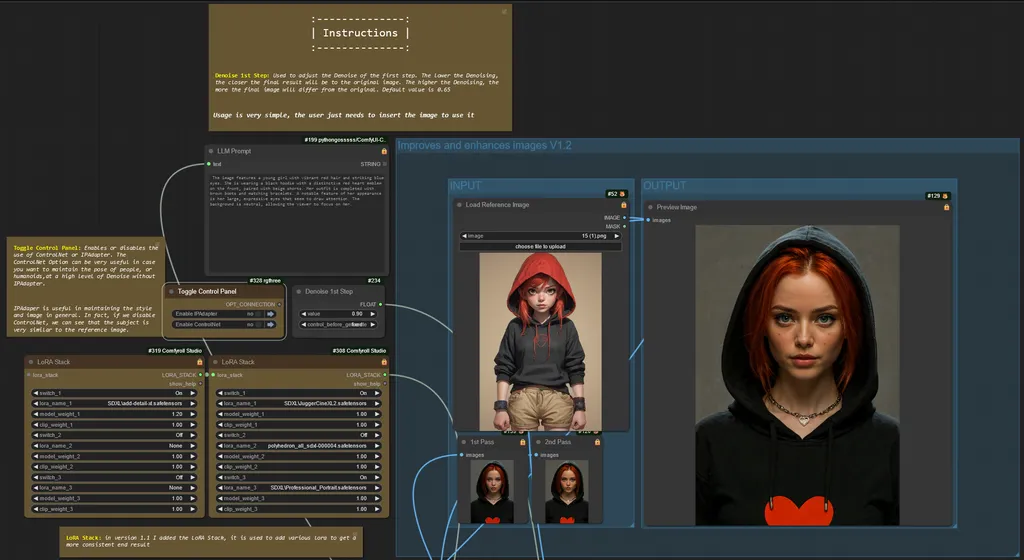 Image 04 - As can be seen, with both features disabled and a Denoise at 0.90, Although there are glimpses of details that match the reference image, I would like to point out that the image is generated based solely on the prompt created by the LLM
- Improved GUI: The GUI has been fixed. A new node called "Toggle Control Panel" has been added. This simple tool allows you to toggle on or off the new features introduced with this version.
To optimize the operation of this version, it is important to ensure that you have updated both ConfyUI and IPAdapter Plus nodes. These updates ensure that the IPAdapter functionality operates at its best capabilities. Therefore, to ensure optimal performance, and to avoid errors, it is recommended to check and install any available updates.
Version 1.3
**New Features:**
Updated User Interface
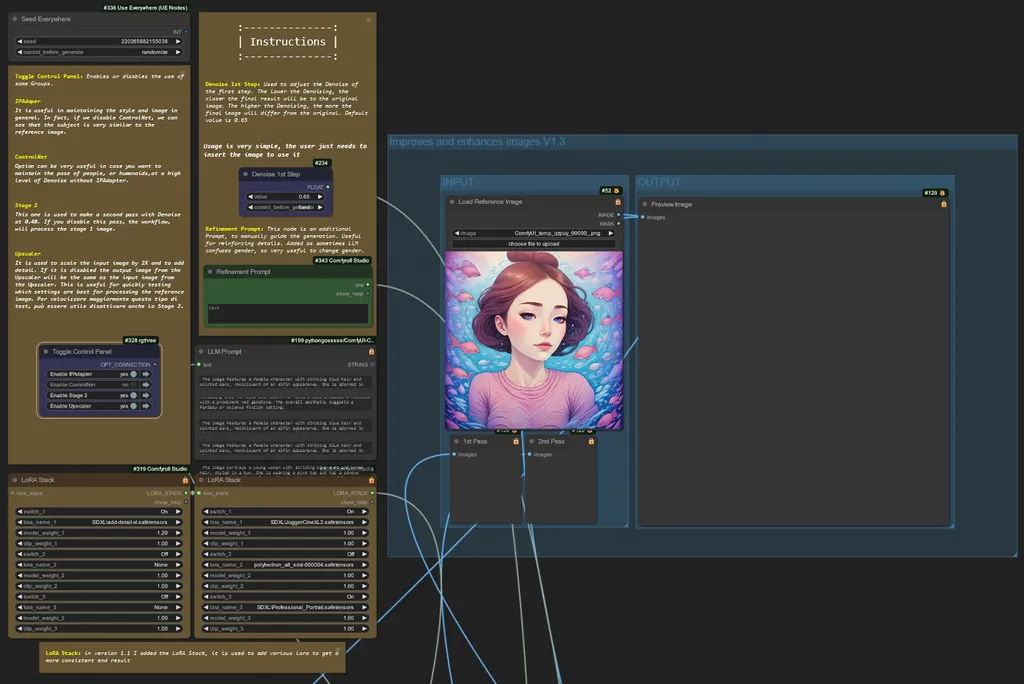
Added Groups to the Toggle Control Panel: Users can now enable and disable the functionalities of Stage 2 and the Upscaler.
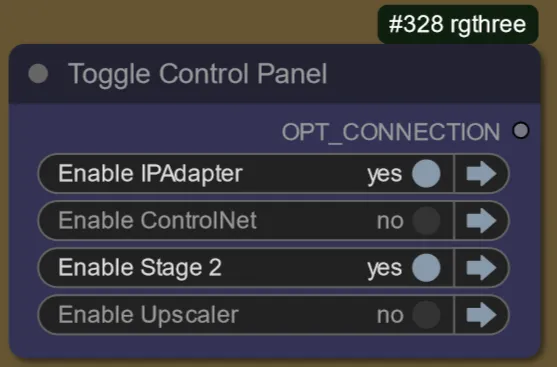
Stage 2: Disable this option if excessive distortions are noticed in the image created in this Stage.
Upscaler: Disable this option for faster generation without the upscaler, optimizing generation speed.
Generation Speed: By simultaneously disabling Stage 2 and the Upscaler, there is a further increase in generation speed. This is particularly useful when experimenting with different workflow options.
Added Refinement Prompt: Introduced a new node called Refinement Prompt, designed to manually guide generation.
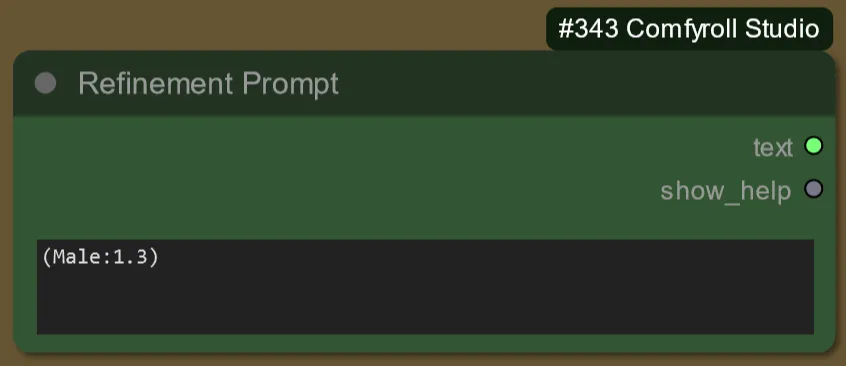 image is for reference only, do not use the format used in the image
Usage: This additional prompt is useful for enhancing the details of the generated output.
- Use Male or Man to steer the LLM toward a masculine gender
- Use Female or Woman to steer the LLM toward a female gender
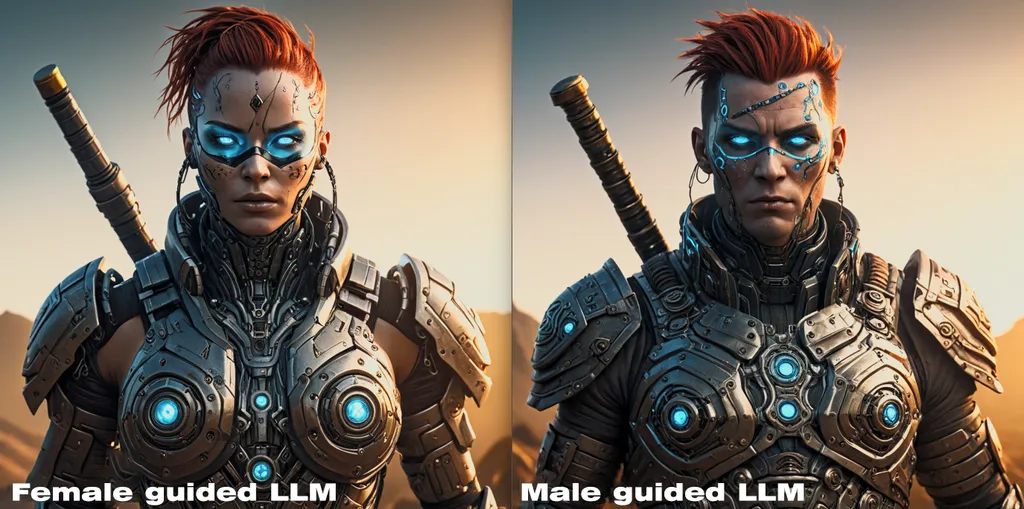
Response to User Requests: Implemented in response to user feedback and my personal observation regarding the need to reinforce the gender, especially when the LLM does not recognize it correctly.
These changes aim to improve the overall user experience and ensure greater flexibility and control during the generation process.
Thank you for your continued support and feedback!
Version 1.4_RC1
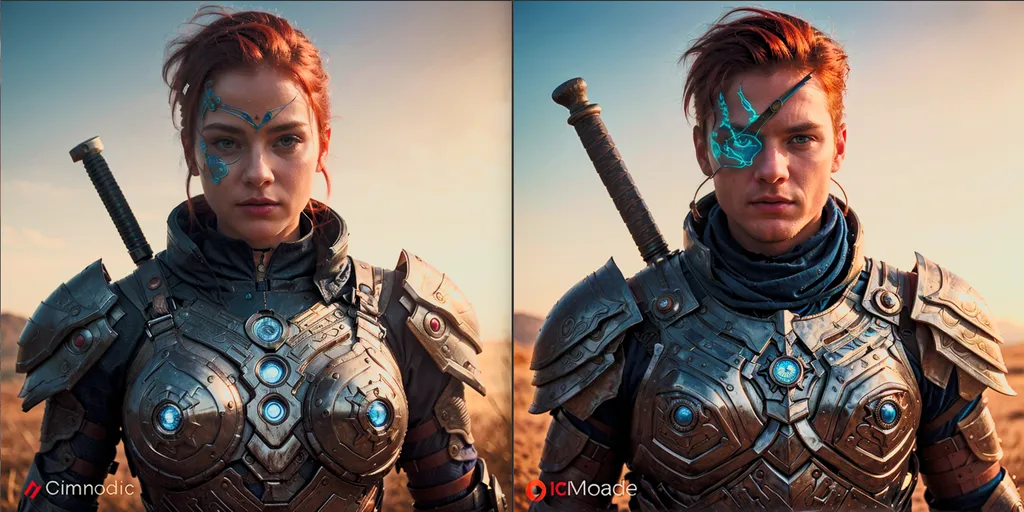
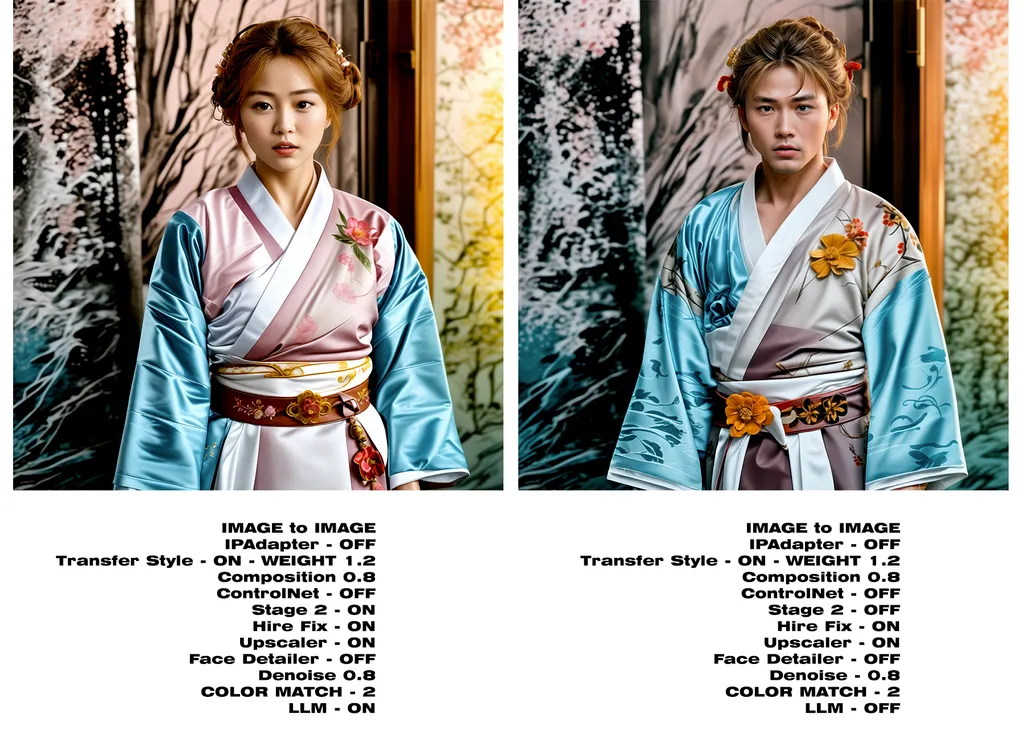
Below is a comparison of 2 images created with the new version.
Note that the images come out of Stage 2, without Upscaler.
below the reference image

Below on the left the image was guided with LLM to woman, while on the right i guided the LLM to create a man.
Version 2.0
I am extremely pleased to announce a major upgrade. As we continue to enrich the workflow with new features and make some changes to how the processes work, I have made the decision to move directly to version 2.0. This is because the update has substantially changed what was the original idea of the project. The main new features of version 2.0 include:
Now the user interface is significantly larger and offers a wide range of options.
The user interface is fully supported by explanations, which unfortunately are not visible in the images below due to the node containing them, but once the workflow is loaded, they are perfectly visible.
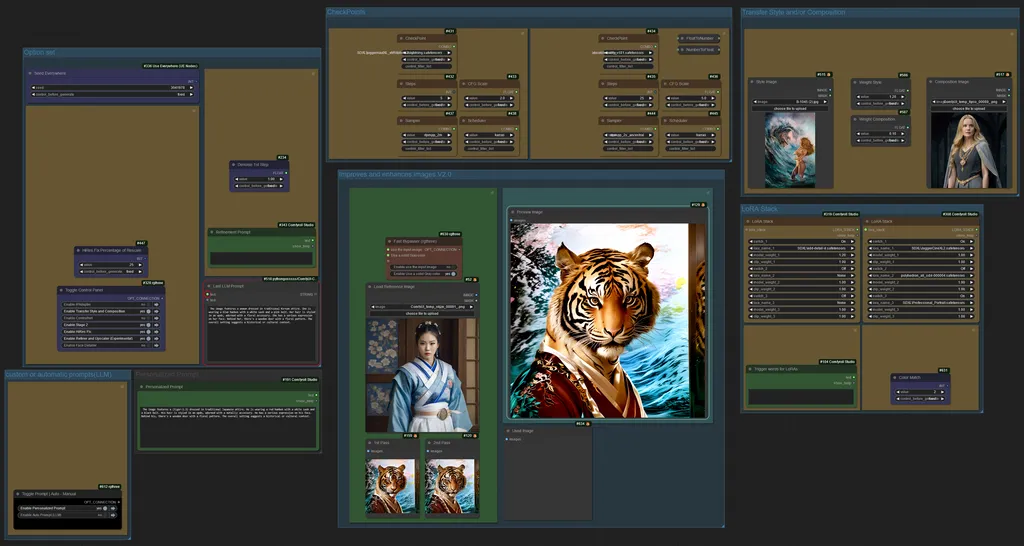
Now, the various options are purposely grouped, allowing the flexibility to move these groups around as desired. This means that users can place them according to their preferences, resulting in a customized user interface.
In the image below you can see how the various groups can be moved around
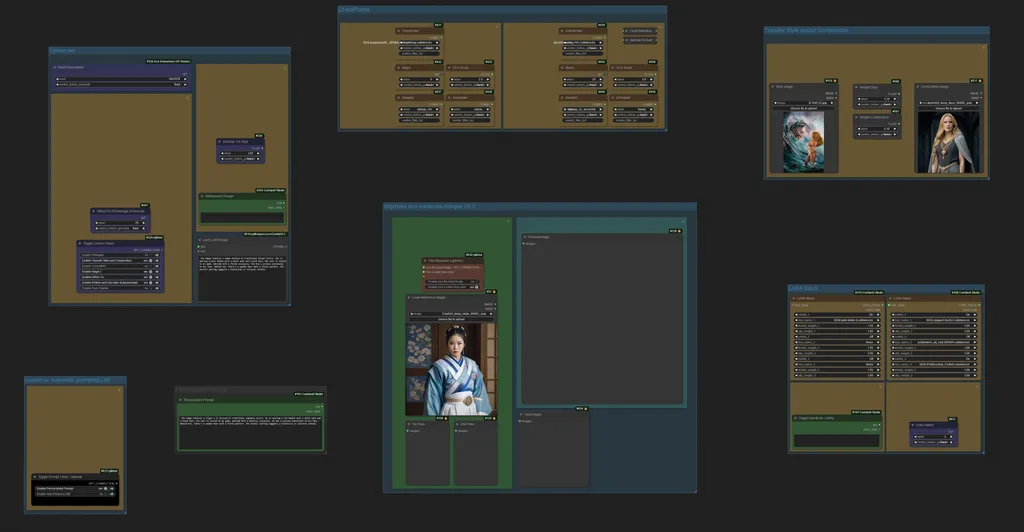
Below, the different groups have been reorganized to create a customized interface. This process is quick and intuitive.
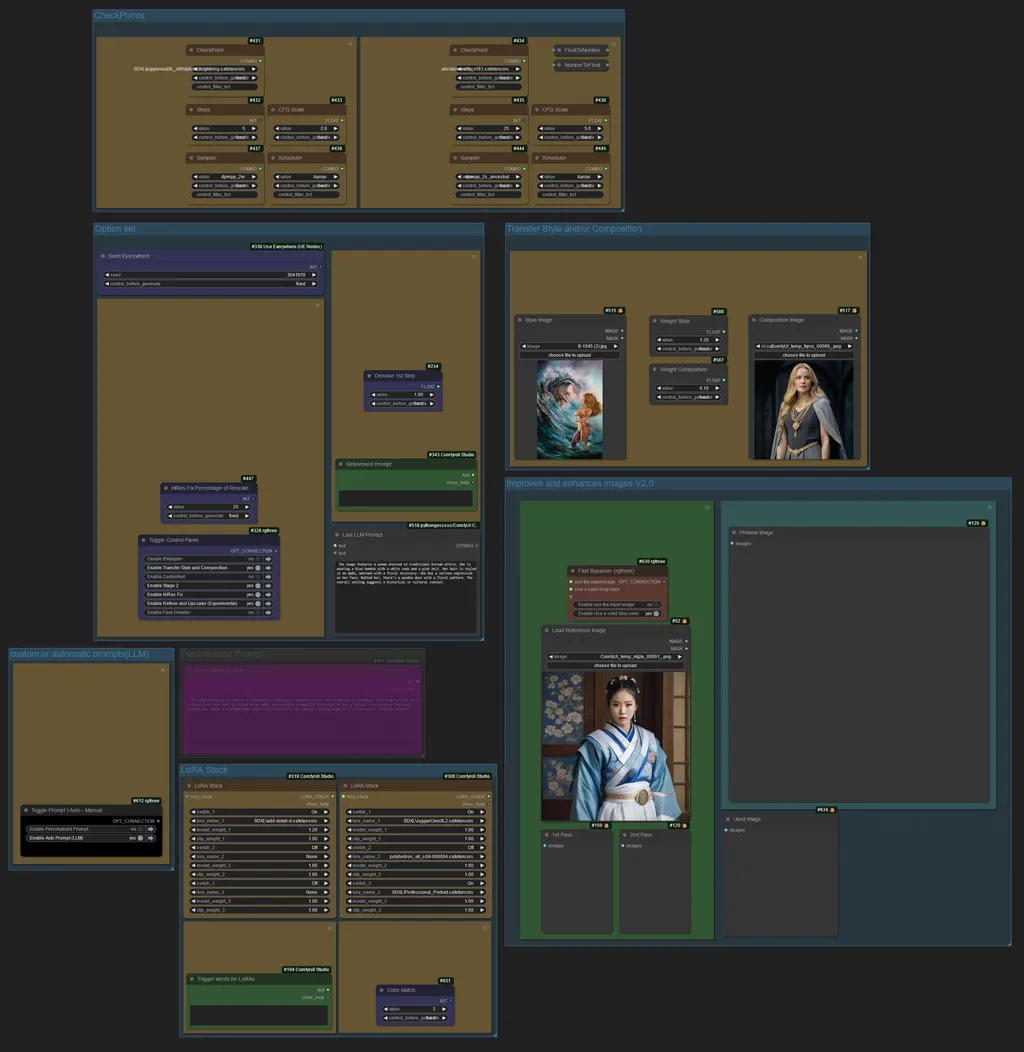
Here is the list of features of the user interface:
1 - CheckPoints Group: Now it's possible to modify the CheckPoints and their options, such as CFG scale, Steps, etc.
If you want to load an SD1.5 checkpoint into the first checkpoint loader, you may do so, but keep in mind that you will not be able to use the Style and Composition Transfer, as Style and Composition transfer are available for SDXL models only
2 - Option Set Group: It contains the following nodes:
- Seed: Used to manage the seeds of the workflow's Samplers.
- Toglle Control Panel: It will be explained later in a separate section.
- HiRes Fix: Modifies the rescale percentage in HiRes Fix.
- Denoise 1st Step: Modifies the Denoise in the first Step.
- Refinement Prompt: Used to inject modifications into the LLM, such as gender.
- Last LLM Prompt: Only serves to display the prompt created by the LLM.
3 - Custom or Automatic Prompt Group: Contains the Toggle Prompt node, which allows choosing between a prompt written by the LLM or activating manual prompt.
4 - Personalized Prompt Group: Here is the text box to write the custom prompt; this group is enabled or disabled through the Toggle Prompt panel described in point 3.
5 - Main Group: We find two subcategories - Input and Output
- Input:
- Fast Bypasser or Fast Switch Input: Used to inform the workflow whether to work as image to image or text to image.
- Load Reference Image: Used as an input image for the image to image mode.
- There are also two small boxes for the preview of the various stages.
- Output:
- Preview box of the final phase. This is the resulting image from the process.
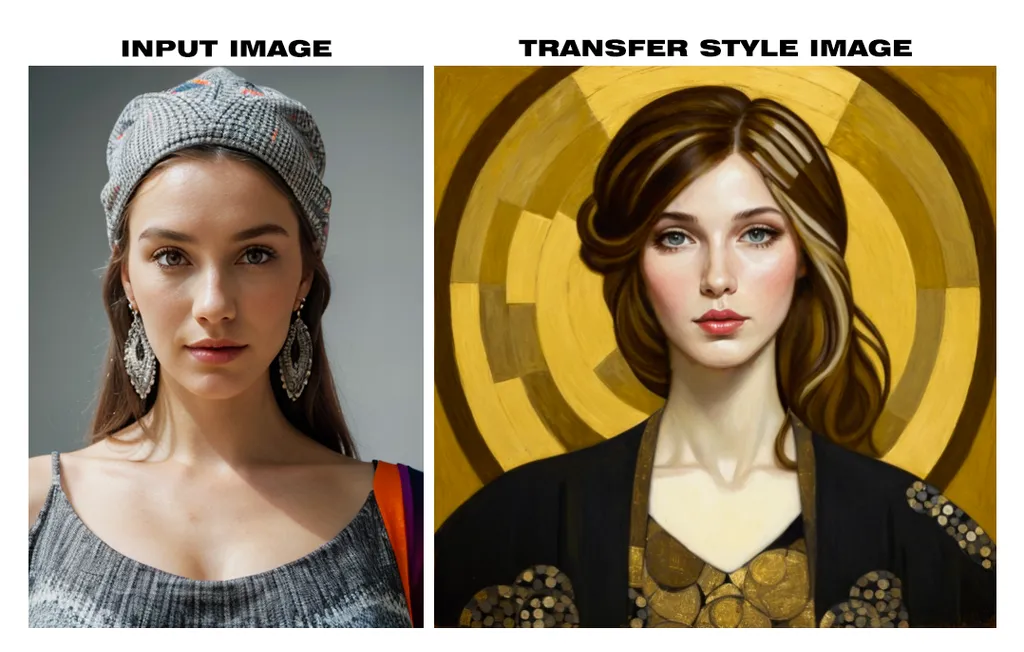
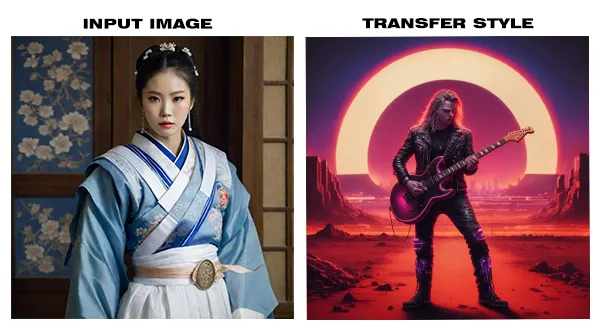
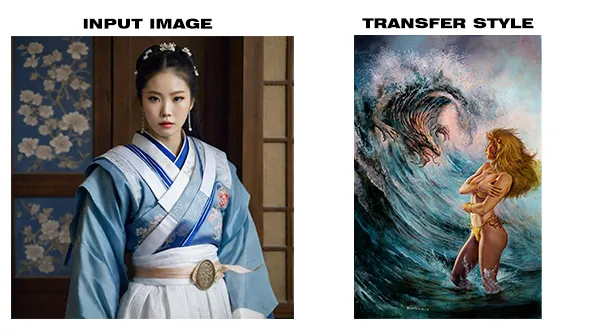
6 - Transfer Style and Composition Group: With the new IPAdapter update, it is now possible to transfer styles and compositions.
- Style Image: The style will be copied from the image loaded into this box.
- Composition Image: The composition will be copied from the image in this box.
- Weight Style and Weight Composition: The weights that will influence both the style and the composition.
7 - LoRA Stack Group:
- We find two boxes to load the LoRAs that we need to obtain the desired image.
- Trigger Words for LoRAs: Useful to insert trigger words that activate the LoRAs loaded in the LoRA Stack group.
- Color Match: Useful for maintaining the original colors in the processed image. There are various options; you can choose to maintain the colors of the input image, those of Stage 1, or those of the style image.
Now the Toggle Control Panel hosts multiple options, which serve to enable or disable functionalities within the workflow.
The various functionalities that can be activated/deactivated are independent of each other, allowing for many combinations to create the desired image.
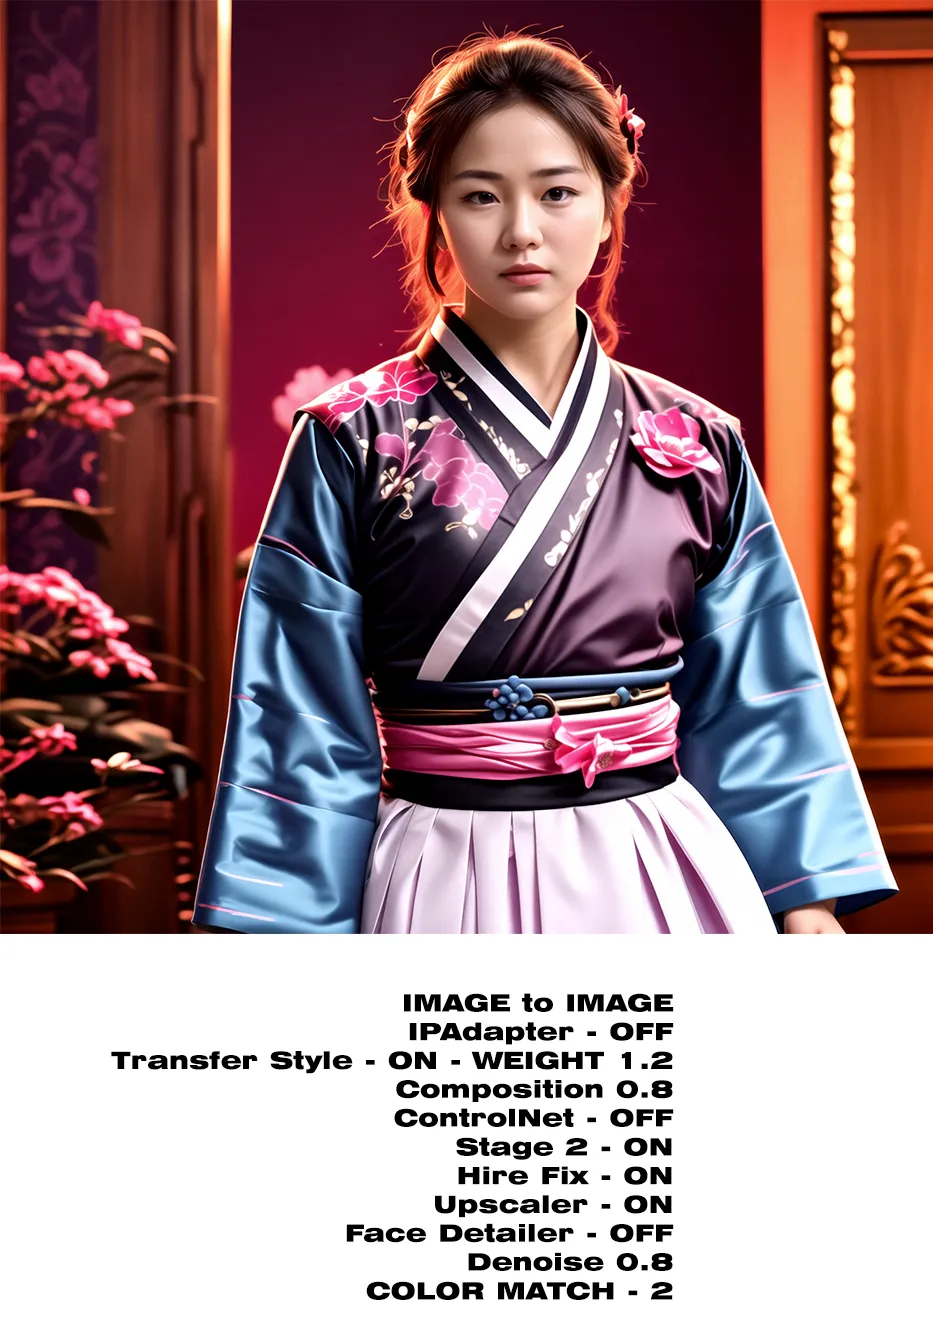
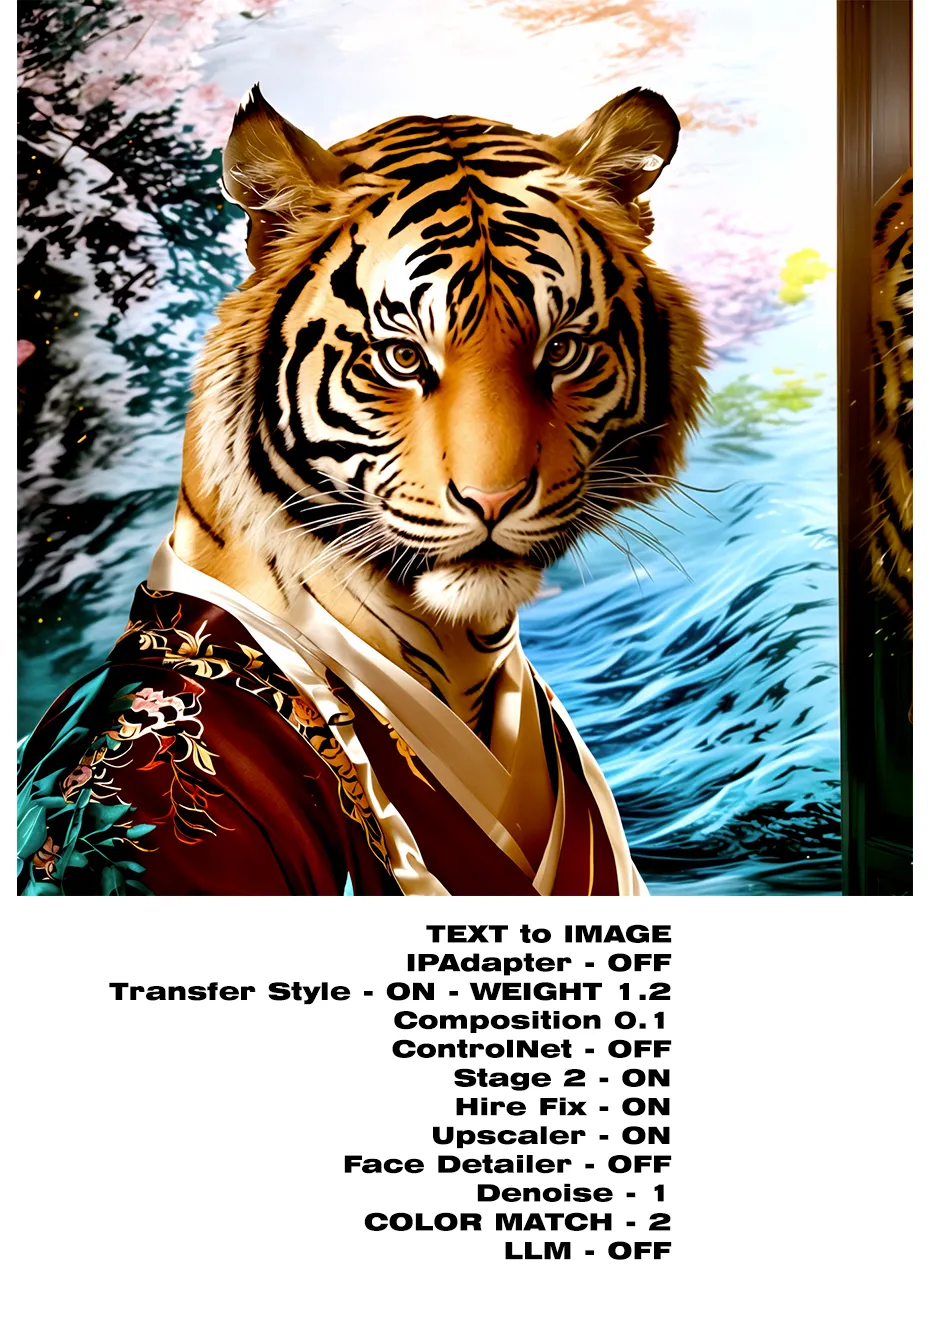
Below is an explanatory image.
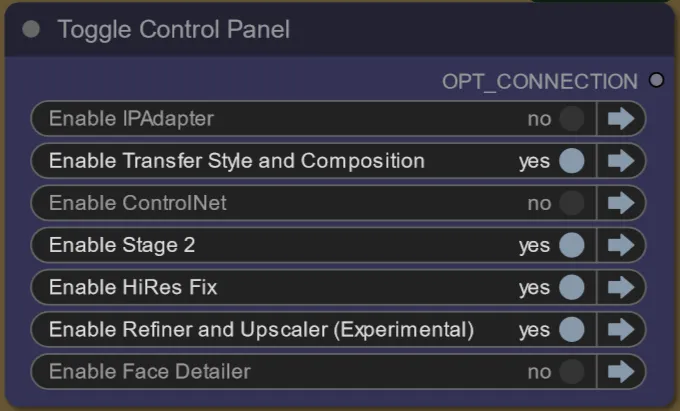
As you can see, we have the switch for style and composition, the switch for HiRes Fix, which is executed immediately after the second Stage, and the switch for upscale has been integrated with the label Refiner. This is because before the upscale, I added a procedure to refine the image before it is processed by the Ultimate SD Upscale. The Face Detailer switch, if you're working with images containing human faces, helps to enhance them.
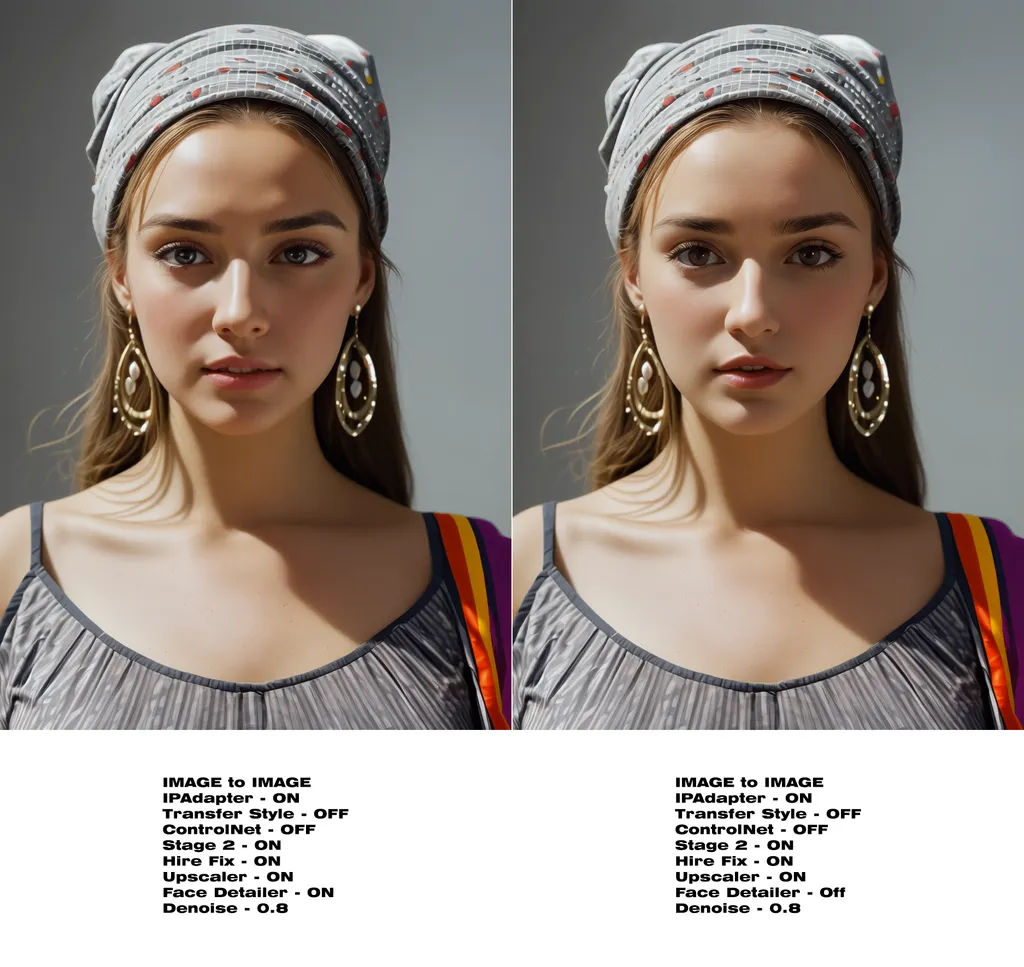
Below, I'm including some comparison images, along with some additional information that will be helpful in understanding how the workflow operates.
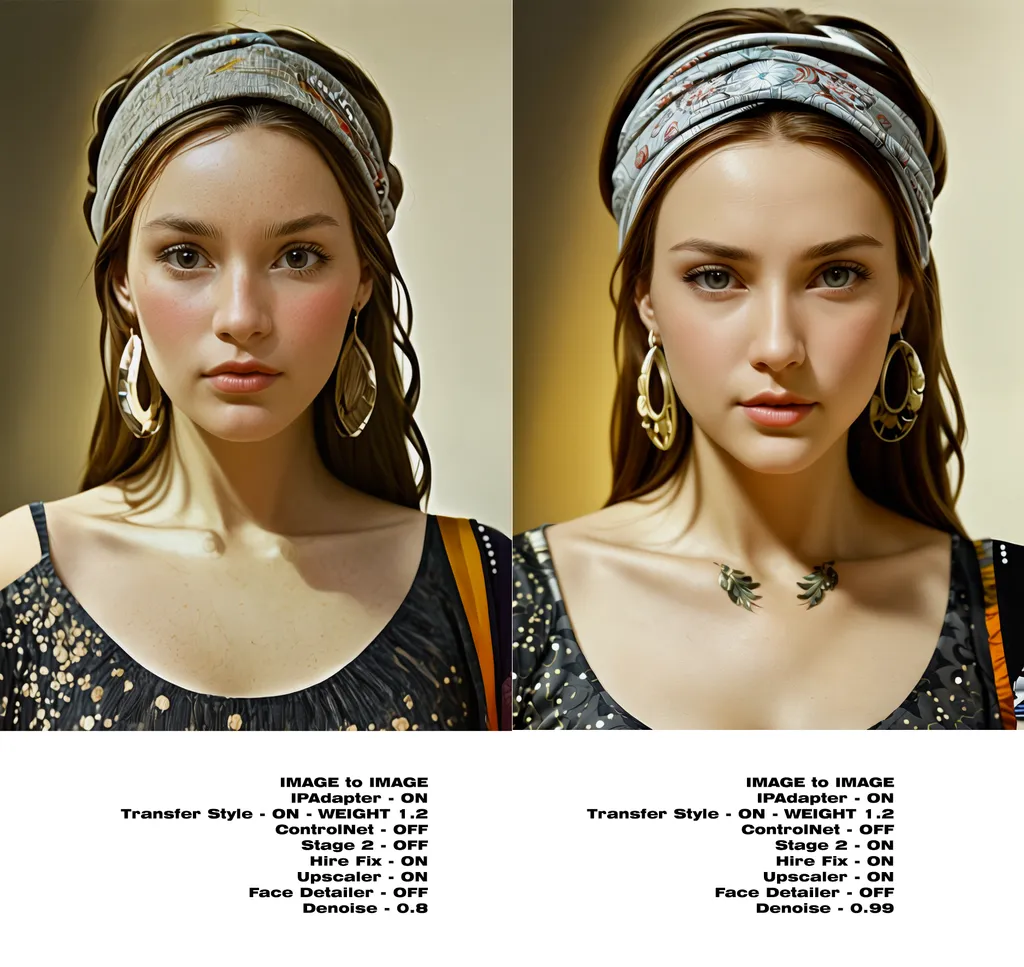
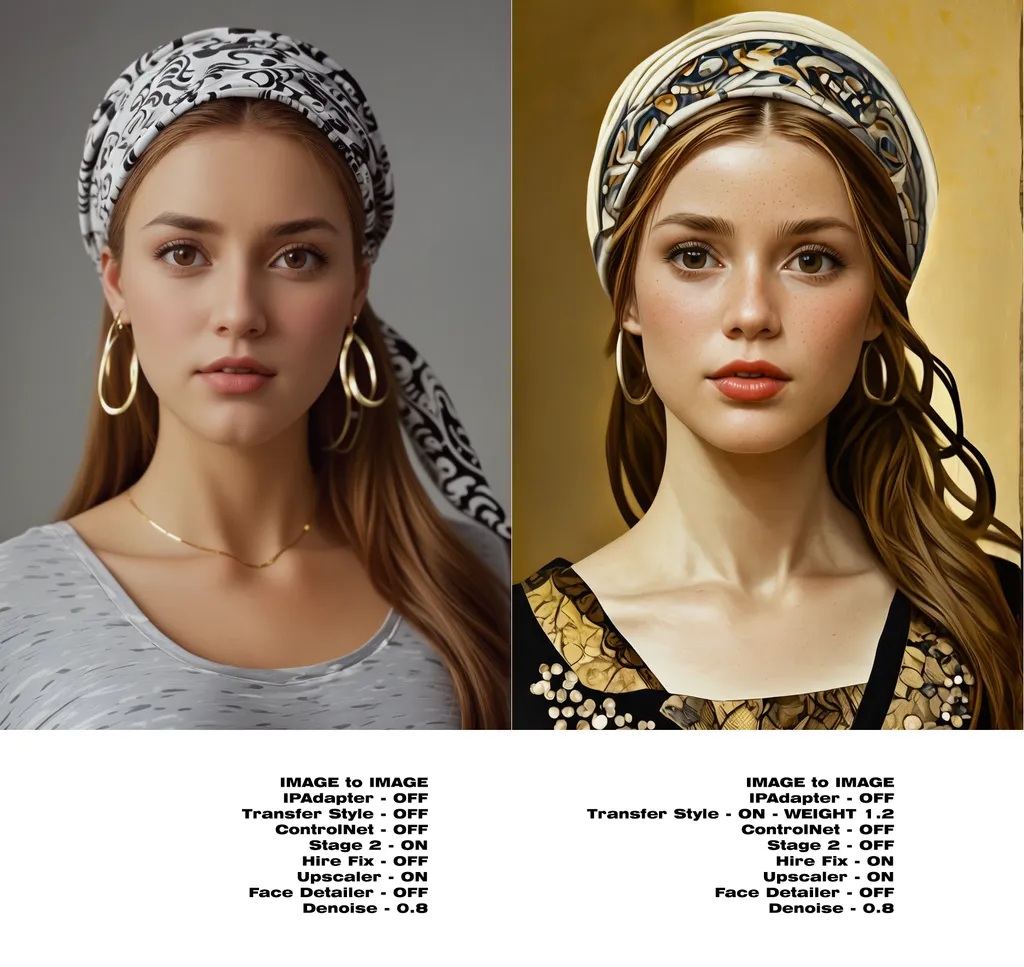
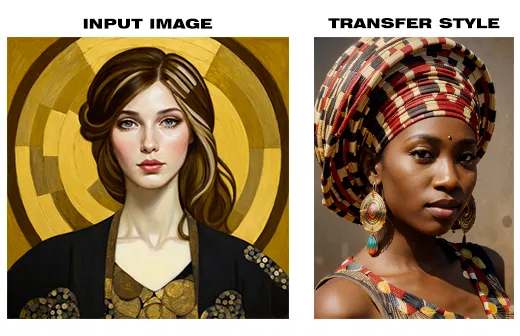
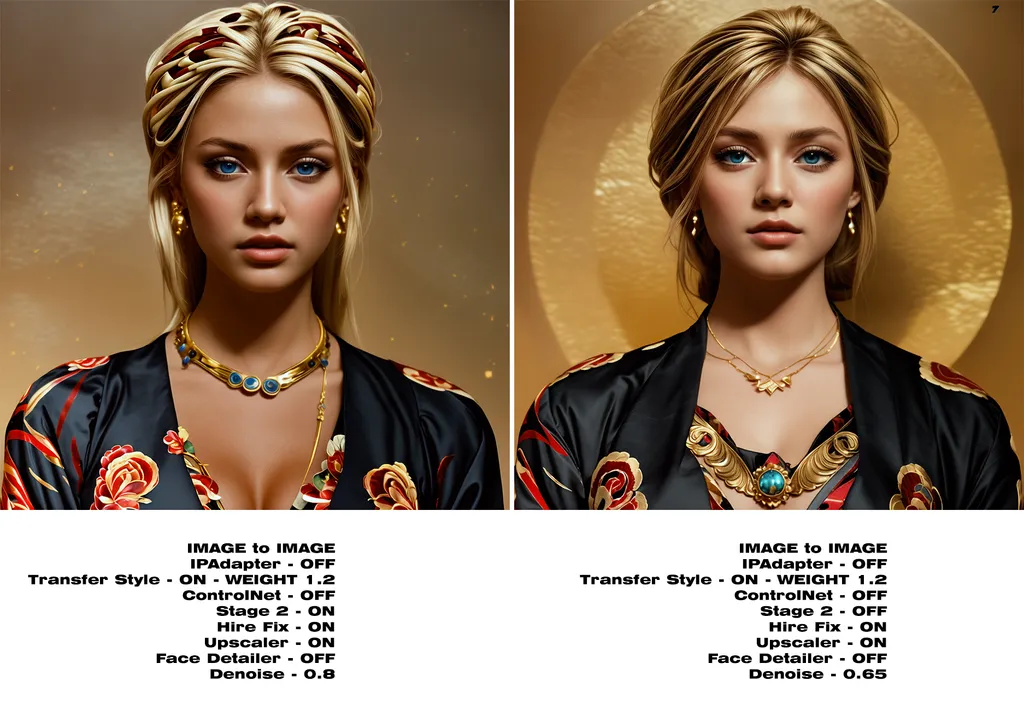
Version 2.0.1
Minor bug fixes
Version 2.0.2
Improvement of some functions
Version 2.0.3
Update for problems with the latest versions of some custom nodes (21/05/02024)
_______________________________________________________________________________________
MODEL SECTION
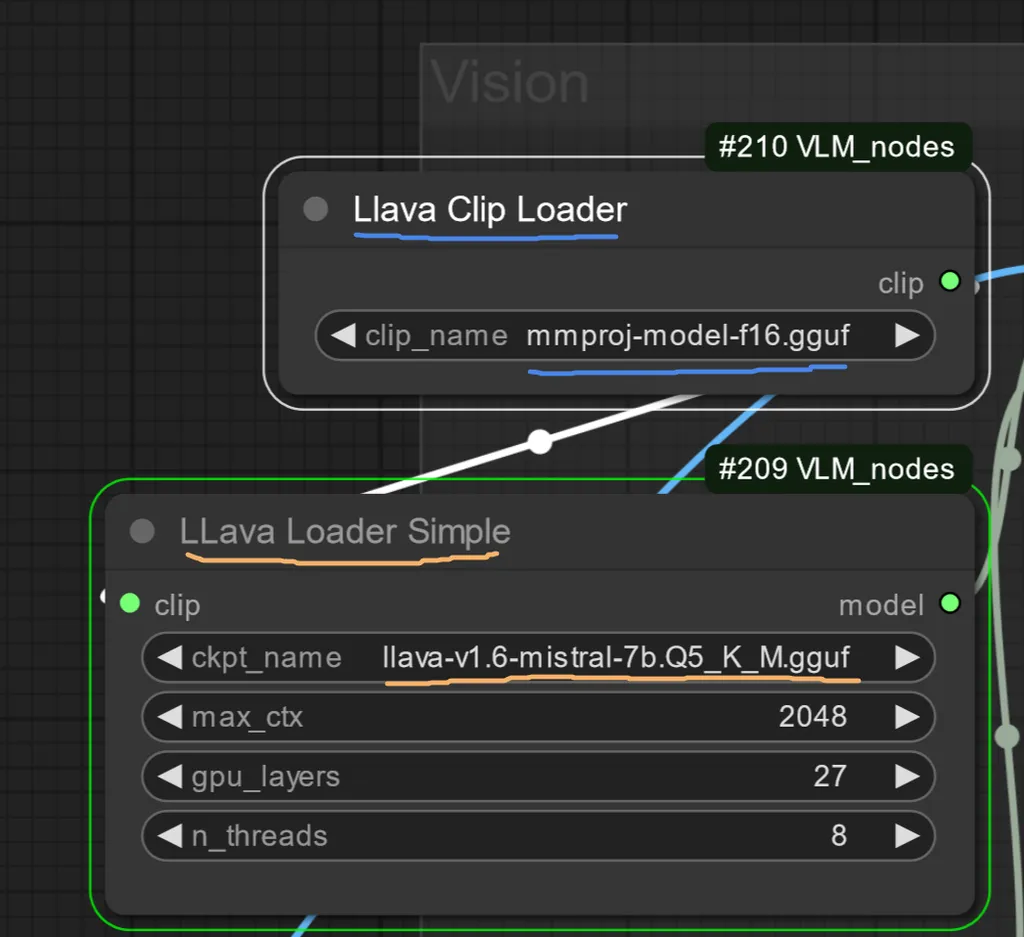
Note: If you don't have the Mistral LLM and the Clip model you can find them on hugging face, llava 1.6 models,
you can find the LLM Model used in the workflow here
you can find the Clip model here , this is used for all versions of LLM Mistral models
these files must be placed in the LLavacheckpoints folder of the ComfyUI models
models\LLavacheckpoints
models must be placed in their respective nodes
The model for Clip-Vision is the Vit_H for SDXL
If you don't have it, you can download it from Here
the model is large 3.43Gb
the model should be entered in ComfyUI\models\clip_vision
The new model that is needed for IPAdapter
with the new version of IPAdapter Plus you have to download the new Clip-Vision Model or SDXL.
The Model can be downloaded from the ComfyUI Manager, by searching on the "Install Models" section for the string "clip_vision", download the Model for XL "CLIP-ViT-H-14-laion2B-s32B-b79K.safetensors".
This Model has a size of [2.5GB]
also download "CLIP-ViT-bigG-14-laion2B-39B-b160k.safetensors", Rename it to recognize it in the future.
TIPS SECTION
To make the most of the workflow, you should clean it up from the active connection links to have a graphical interface without all the visible connection lines. To do this, you'll need to disable the display from the "Link Render Mode" option in the ComfyUI Manager settings. Below is a brief explanation with images:
click on the gear symbol at the top right of the comfyui manager.

just opened the settings window
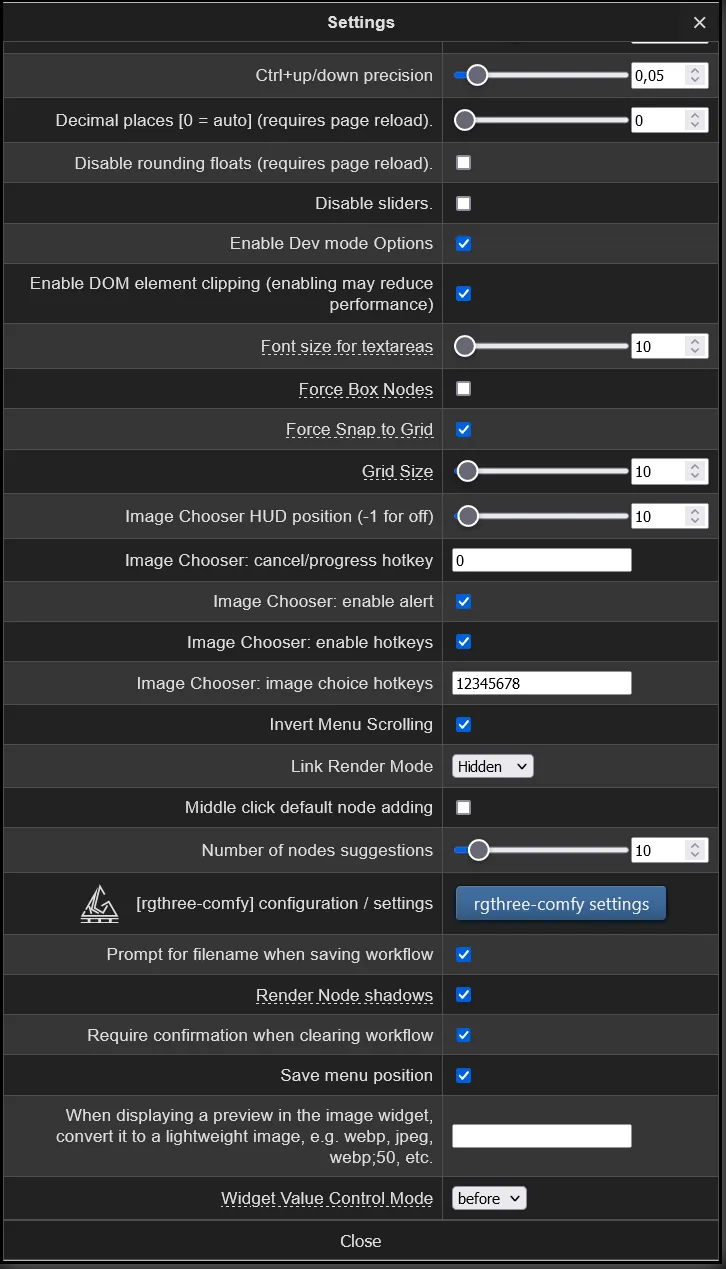
search for the following option and select hidden
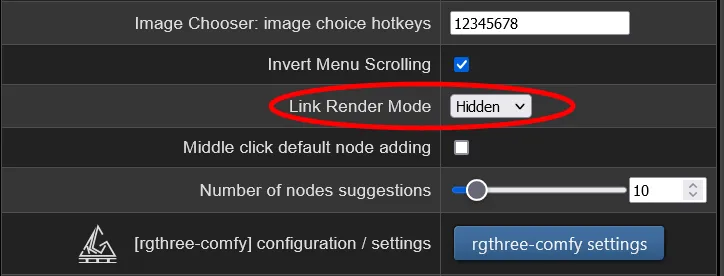
that's all
_____________________________________________________________________________
DISCLAIMER
_____________________________________________________________________________
I declare that all the images, drawings, and photos used as input and uploaded to this page as assets are my property. They are all original and created by me through hand drawing, digital paintings using graphic software, photos taken in real life, and created through other workflows of my creation. I release these images on the OpenArt Flow | Builder page as assets and as they are, and I give consent for the use of such images by users who download my workflow. I kindly ask that users cite the source in the comments if they are used in other workflows or on other pages, forums, social media, etc.
Discussion
(No comments yet)
Loading...
Resources (17)
Reviews
No reviews yet
Versions (10)
- latest (2 years ago)
- v20240521-101411
- v20240410-094255
- v20240407-174804
- v20240331-010514
- v20240330-203826
- v20240327-101354
- v20240327-081827
- v20240324-105810
- v20240322-012309
Node Details
Primitive Nodes (71)
Context (rgthree) (2)
Context Switch (rgthree) (1)
DF_Image_scale_to_side (2)
Fast Bypasser (rgthree) (1)
Fast Groups Bypasser (rgthree) (2)
Note (1)
Note Plus (mtb) (10)
PrimitiveNode (15)
Reroute (35)
Reroute (rgthree) (2)
Custom Nodes (110)
- ImageBatchGet (1)
- ImageEffectsAdjustment (1)
- CM_FloatToNumber (1)
- CM_NumberToFloat (1)
- CR Apply LoRA Stack (1)
- CR LoRA Stack (2)
- CR Module Input (1)
- CR Load LoRA (3)
- CR Module Pipe Loader (1)
- CR Text (5)
- CR Prompt Text (2)
ComfyUI
- FreeU_V2 (1)
- ControlNetLoader (4)
- CLIPTextEncode (10)
- ControlNetApply (4)
- PreviewImage (14)
- VAELoader (2)
- CLIPVisionLoader (1)
- CheckpointLoaderSimple (2)
- VAEDecodeTiled (2)
- KSampler (2)
- ConditioningCombine (2)
- UpscaleModelLoader (1)
- CLIPSetLastLayer (1)
- ImageBatch (2)
- VAEEncode (1)
- LoadImage (3)
- unCLIPConditioning (1)
- CLIPVisionEncode (1)
- VAEDecode (1)
- EmptyImage (1)
- VAEEncodeTiled (1)
- GetImageSize+ (1)
- UltralyticsDetectorProvider (1)
- SAMLoader (1)
- FaceDetailer (1)
- DWPreprocessor (2)
- IPAdapterAdvanced (1)
- IPAdapterStyleComposition (1)
- IPAdapterNoise (1)
- IPAdapterUnifiedLoader (1)
ComfyUI_tinyterraNodes
- ttN hiresfixScale (1)
- FilmGrain (1)
- ColorMatch (1)
ntdviet/comfyui-ext
- gcLatentTunnel (3)
- PlaySound|pysssss (1)
- ShowText|pysssss (3)
- UltimateSDUpscale (1)
- Seed Everywhere (1)
- LLava Loader Simple (1)
- LlavaClipLoader (1)
- LLavaSamplerAdvanced (1)
- Text Multiline (3)
- Text Concatenate (5)
- Image Film Grain (1)
Model Details
Checkpoints (2)
absolutereality_v181.safetensors
crystalClearXL_ccxl.safetensors
LoRAs (6)
SDXL\JuggerCineXL2.safetensors
SDXL\Professional_Portrait.safetensors
SDXL\add-detail-xl.safetensors
aodai_SD_chiasedamme_v02.safetensors
polyhedron_all_eyes.safetensors

