Text2Vid Background and Character
5.0
1 reviews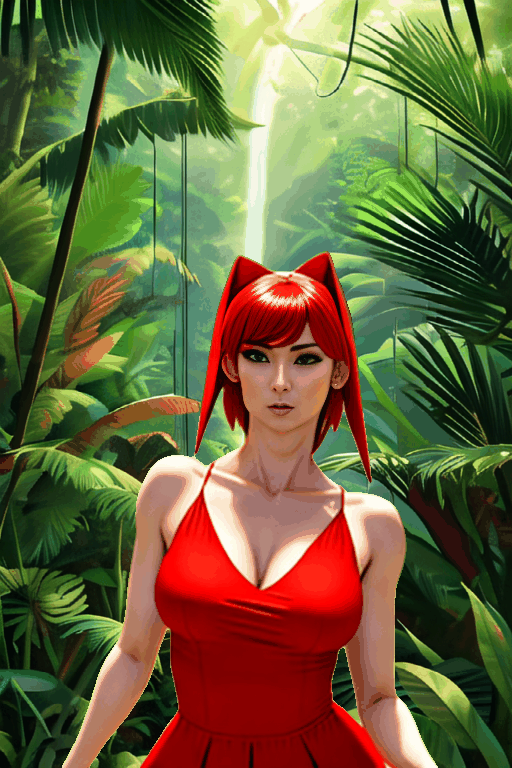
Description
Workflow:
Text To Video - Animate Anyone + SVD + ControlNet
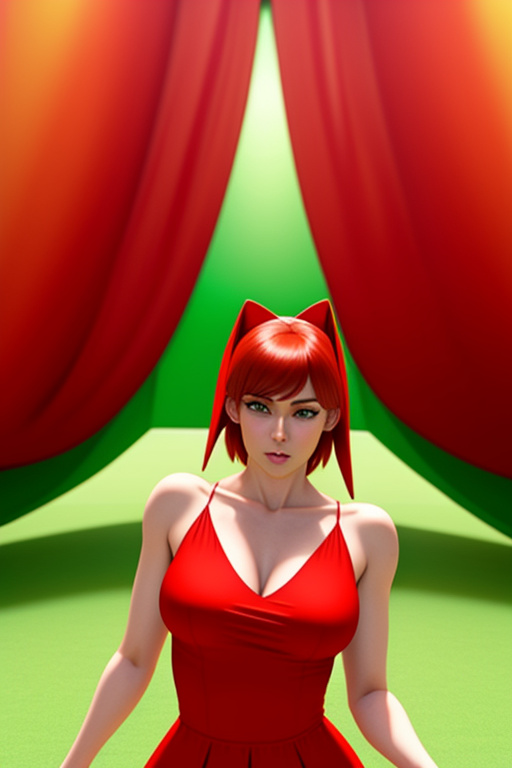
- Generate Background using Text2Img
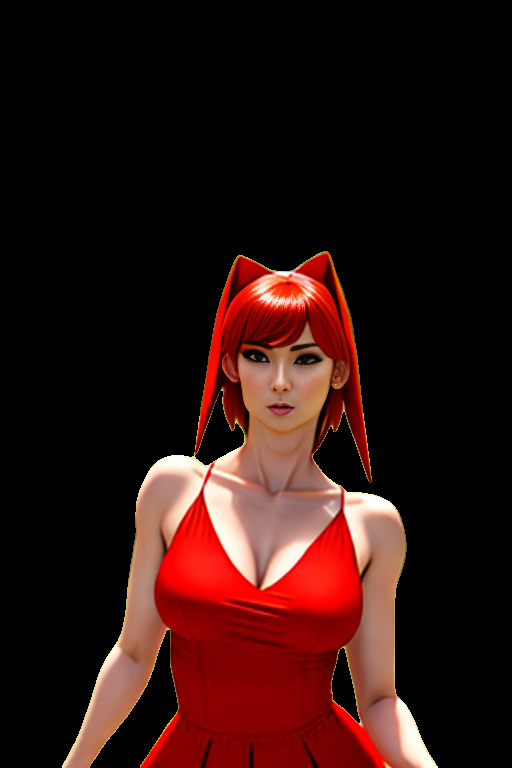
- Generate Character with Text2Img
- Generate Background animation using SVD
- Generate Character Animation using AnimateAnyone
- Remove Character Background using Rembg
- Layer Character over Background using Layer Style Node
Ideal for 512(w) x 768 (h)
---------------------------------------------------------------------------------------------------------
This is the first workflow I have attempted to put effort in to, It may have issues but from testing seems to work as intended. Testing conducted on a Nvidia 4090.
The concept of this workflow is to take inspiration from V-tuber software and layer the character over the a background.
The benefits of this is that it avoids the morphing and alteration of the background that Animate Anyone alone normally creates.
Sadly the downside of using the rembg node is it doesn't always remove the entire background.
From testing in photoshop the results are basically identical to if you went in to photoshop and used the remove background feature frame by frame.
This means for characters wearing long dresses or not moving their arms it works perfectly, but for more expressive poses or arm movement you may need to clean frames manually.
If anyone knows of a better solution to this please do not hesitate to let me know.
---------------------------------------------------------------------------------------------------------
Workflow colour code:
(Nodes)
Green: input (requires modification to work)
Red: no need to alter (recommended to leave the same and use same models or inputs for best results)
Purple: not needed to alter but for best results may wish to. (mostly K-samplers, alter denoising strength, seed, steps)
Blue: Notes (helpful information to try explain what is happening at each section without being intrusive)
(Groups)
Blue: main Workflows
Yellow: Switches, disconnect the nodes in a switch to prevent workflow from continuing, (ideal for testing)
--------------------------------------------------------------------------------------
This workflow was originally designed as a test to help me learn Comfy UI and may have issues. If you have any tips of how to improve the workflow I am always willing to learn.
Discussion
(No comments yet)
Loading...
Resources (2)
Reviews
No reviews yet
Versions (1)
- latest (2 years ago)
Node Details
Primitive Nodes (63)
Note (15)
Reroute (43)
[ComfyUI-3D] Animate Anyone Sampler (1)
[ComfyUI-3D] Load Pose Guider (1)
[ComfyUI-3D] Load UNet2D ConditionModel (1)
[ComfyUI-3D] Load UNet3D ConditionModel (1)
[ComfyUI-3D] Pose Guider Encode (1)
Custom Nodes (45)
ComfyUI
- ControlNetApply (1)
- VAEEncode (1)
- ImageScale (2)
- VAELoader (1)
- CLIPVisionEncode (1)
- VAEDecode (4)
- PreviewImage (2)
- KSamplerAdvanced (2)
- KSampler (1)
- LoadImage (1)
- ImageOnlyCheckpointLoader (1)
- VideoLinearCFGGuidance (1)
- SVD_img2vid_Conditioning (1)
- LoraLoaderModelOnly (1)
- EmptyLatentImage (2)
- CheckpointLoaderSimple (2)
- CLIPTextEncode (5)
- ConditioningConcat (1)
- ControlNetLoader (1)
- CLIPVisionLoader (1)
- ImpactImageBatchToImageList (2)
- ImageListToImageBatch (1)
- LayerUtility: ImageBlend (1)
- VHS_VideoCombine (4)
- VHS_LoadVideo (1)
- INTConstant (2)
- ReActorFaceSwap (1)
- Image Rembg (Remove Background) (1)
Model Details
Checkpoints (3)
realcartoon3d_v13.safetensors
svd_xt.safetensors
LoRAs (1)
greenscreen.safetensors